Hey DIYers, The following pages will give you some insight on how to approach a basement remodel project. I made many mistakes during my remodel and learned many valuable lessons. On the pages that follow, you will find a full record of cost, stories of my experience, and general advice. I have also included a list of contractor names + contact information. I hope it is a valuable tool to you or anyone embarking on their own project.
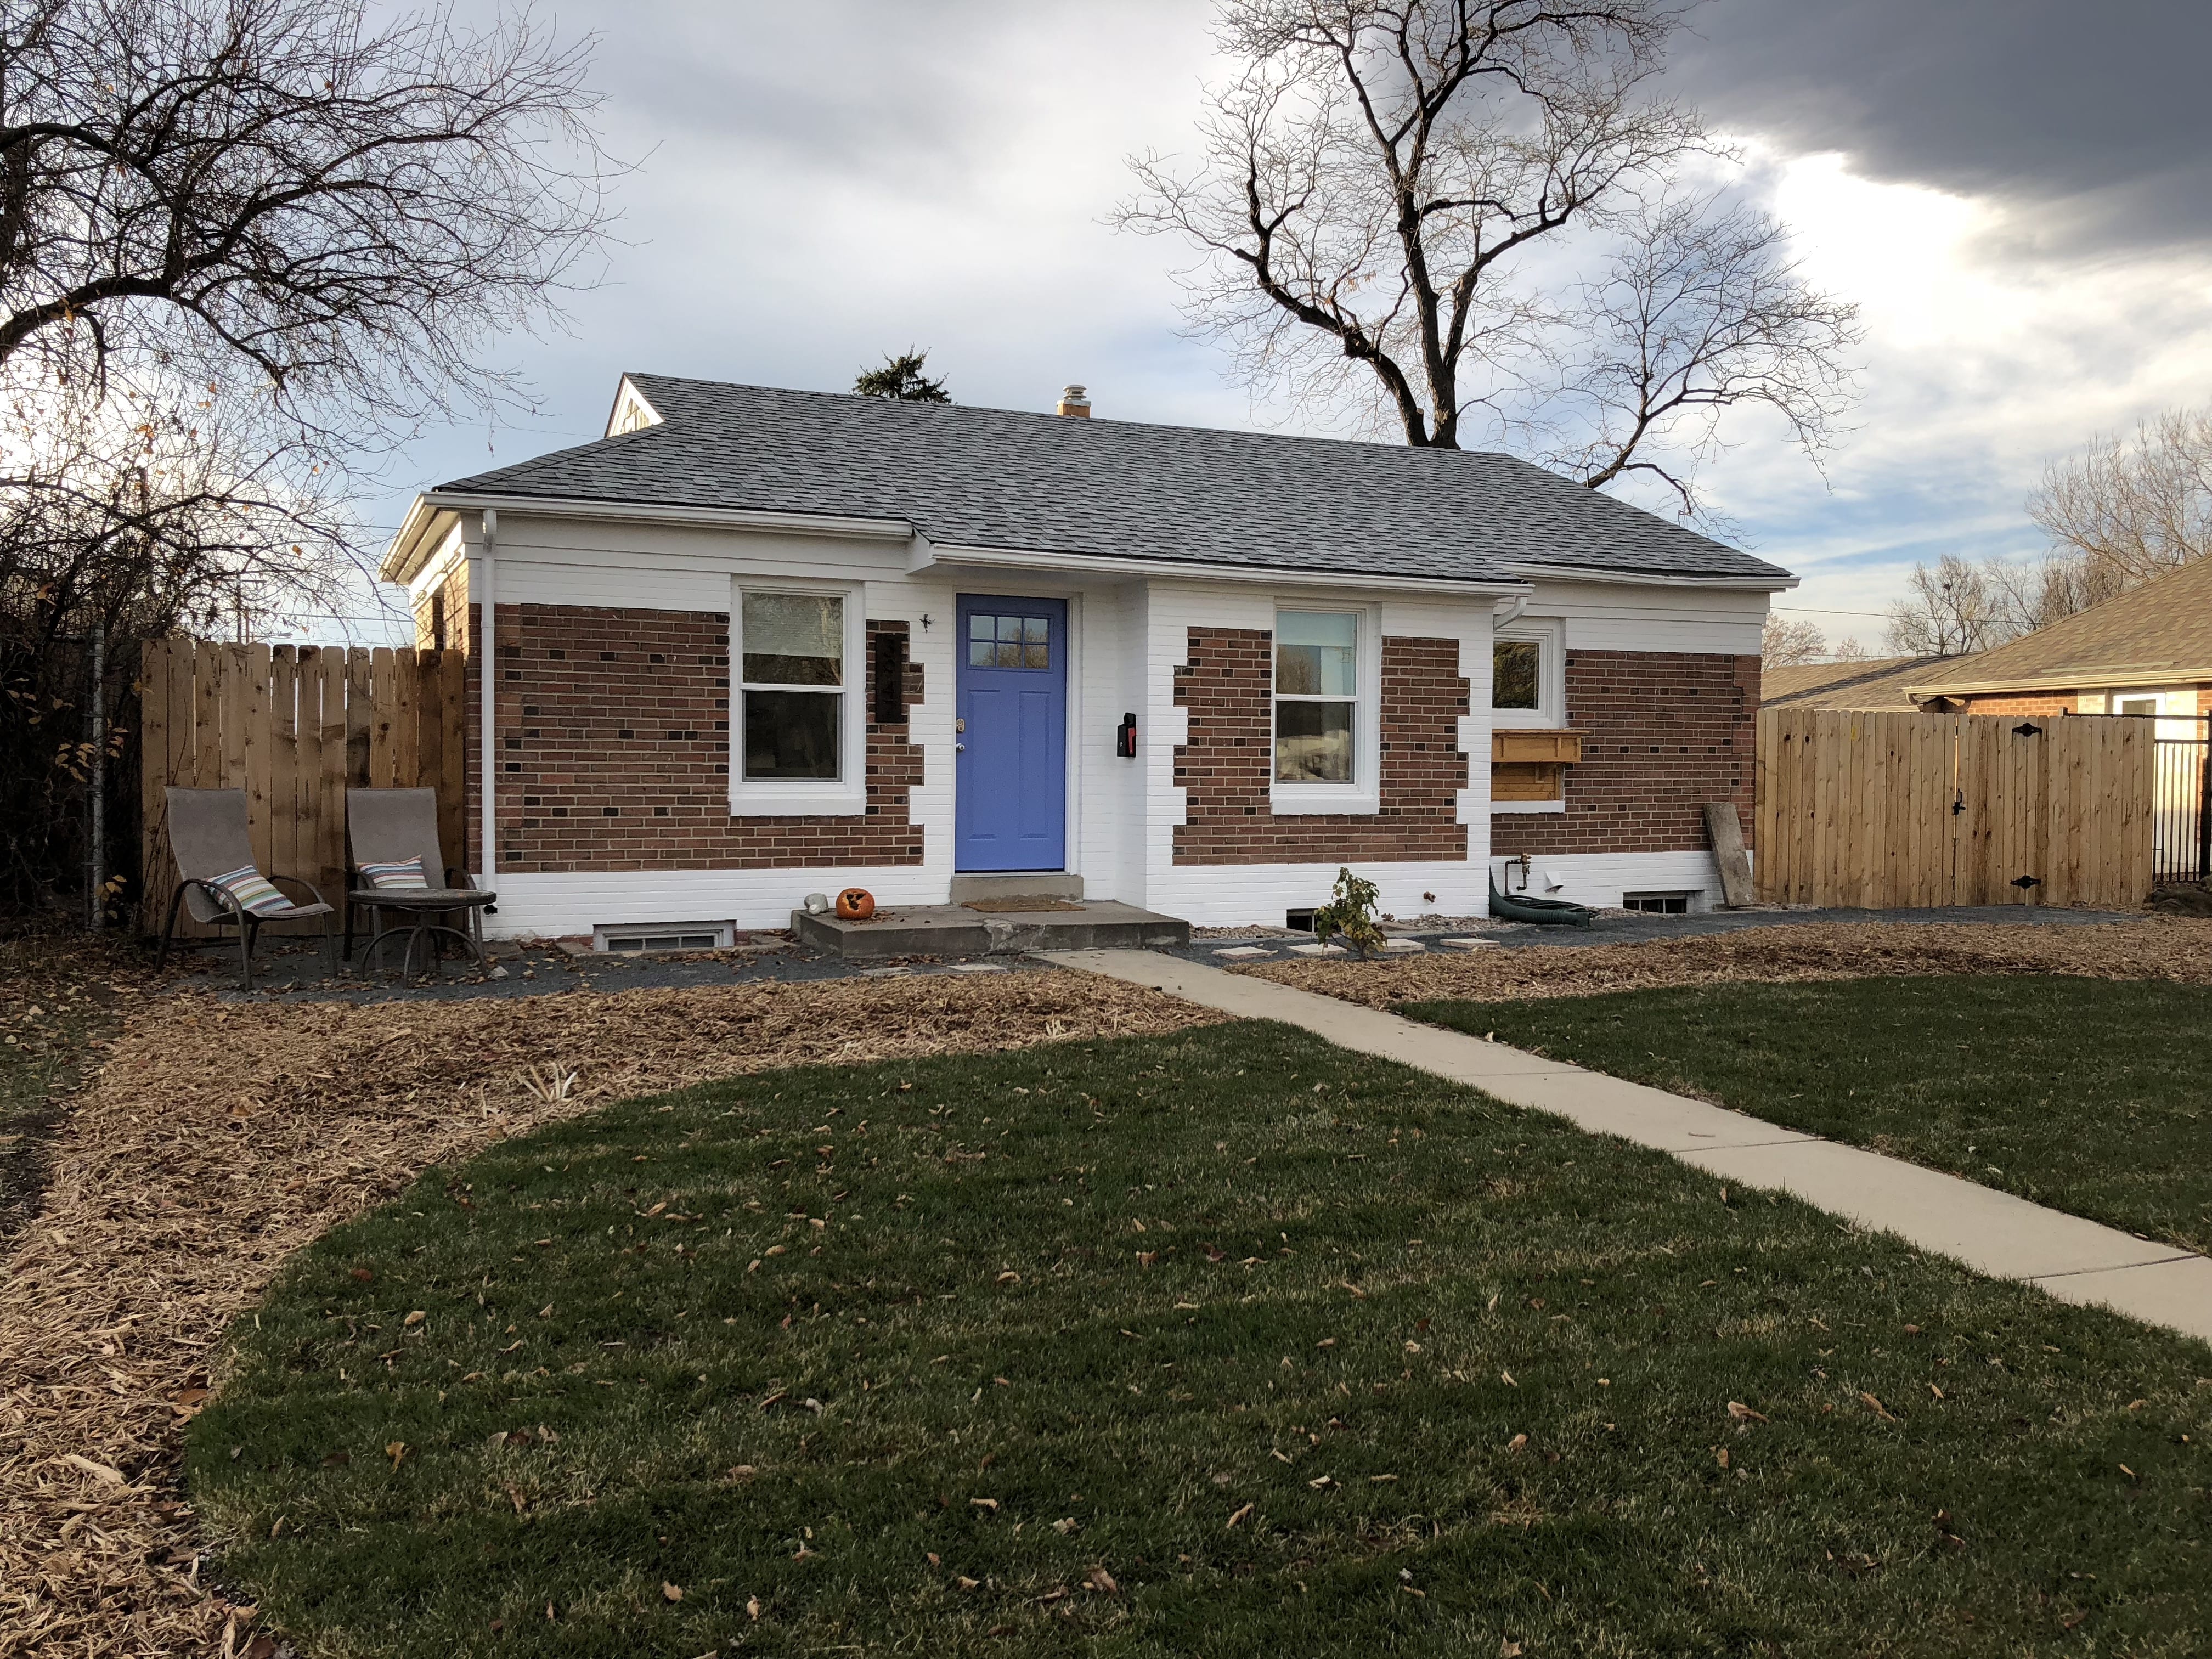
In April 2017 I purchased a 1942 brick fixer-upper in the Skyland neighborhood North of City Park Golf Course. The home is 831 square feet on the main level with the same square footage in the basement. 151 sq ft in the basement had been finished to make a third bedroom that was being used to grow marijuana by the previous tenants. When I purchased the home I completely remodeled the main level. The remodel project included: refinishing the wood floors, complete remodel of the kitchen, new windows, new doors, converting a window into a new exterior door, updating the bathroom, and updating all the galvanized plumbing.
I am a 30-year-old female who works full time as a real estate agent in Denver, Colorado. As you will find, I am no expert in construction or renovation. I undertook this project for professional development. Understanding home construction and the costs of renovating makes me a better resource when advising clients on buying/selling.
I also wanted to generate rental income from the basement. The finished bedroom in the basement was rented out for $700/month before the overhaul and now is rented for $1200/month covering 63% of my mortgage.
This investment in my home also increased the equity. I purchased the home for $315K in April 2017. After the major $60K renovation of the main level, I estimated the value of the home to be about $420K. Finishing the basement cost $40K and bought the value of the home to about $510K based on comparable properties in the neighborhood. My investment of $100K into the home was doubled. This allowed me to drop my private mortgage insurance which saves me 5% or $100 per month.
The home renovation also gives me about $200K in home equity that I will use to fund my next real estate investment, building a 1000 sq ft Accessory Dwelling Unit (ADU) on the back half of my 8000 sq ft lot that I can rent on AirBnB. This will generate another $2000/m of rental income. I learned a lot and I do believe it has been a good investment!
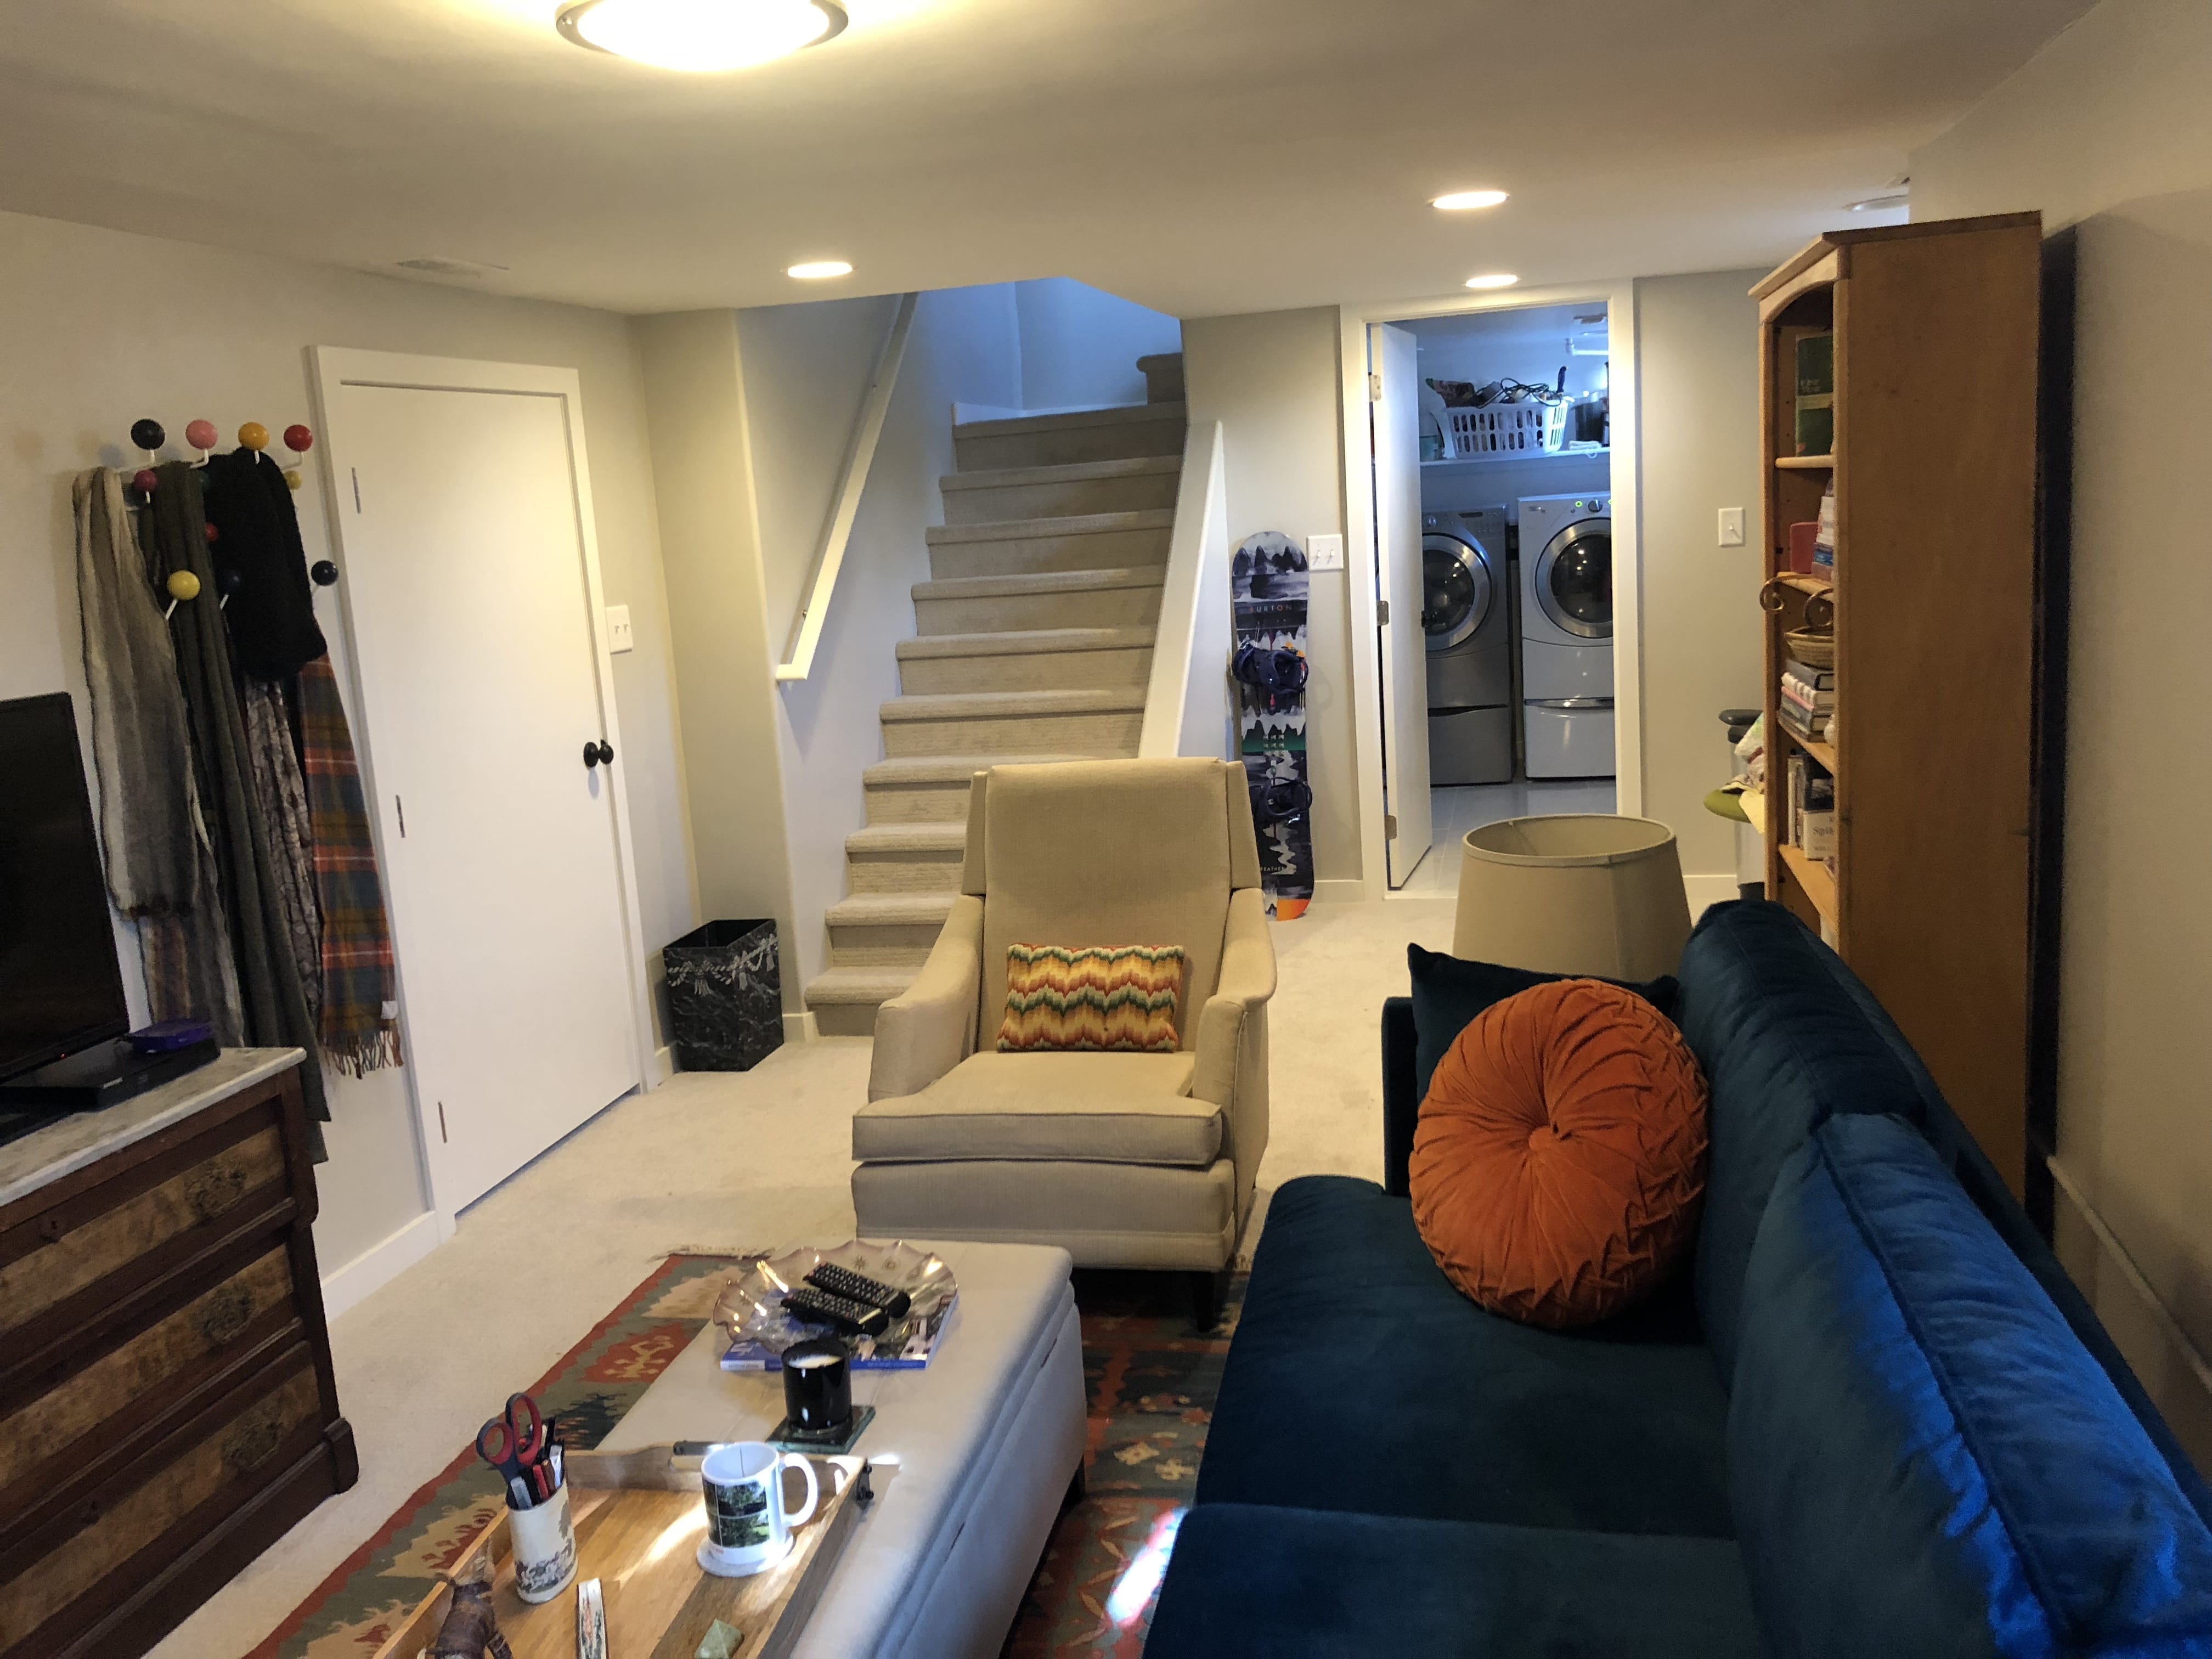
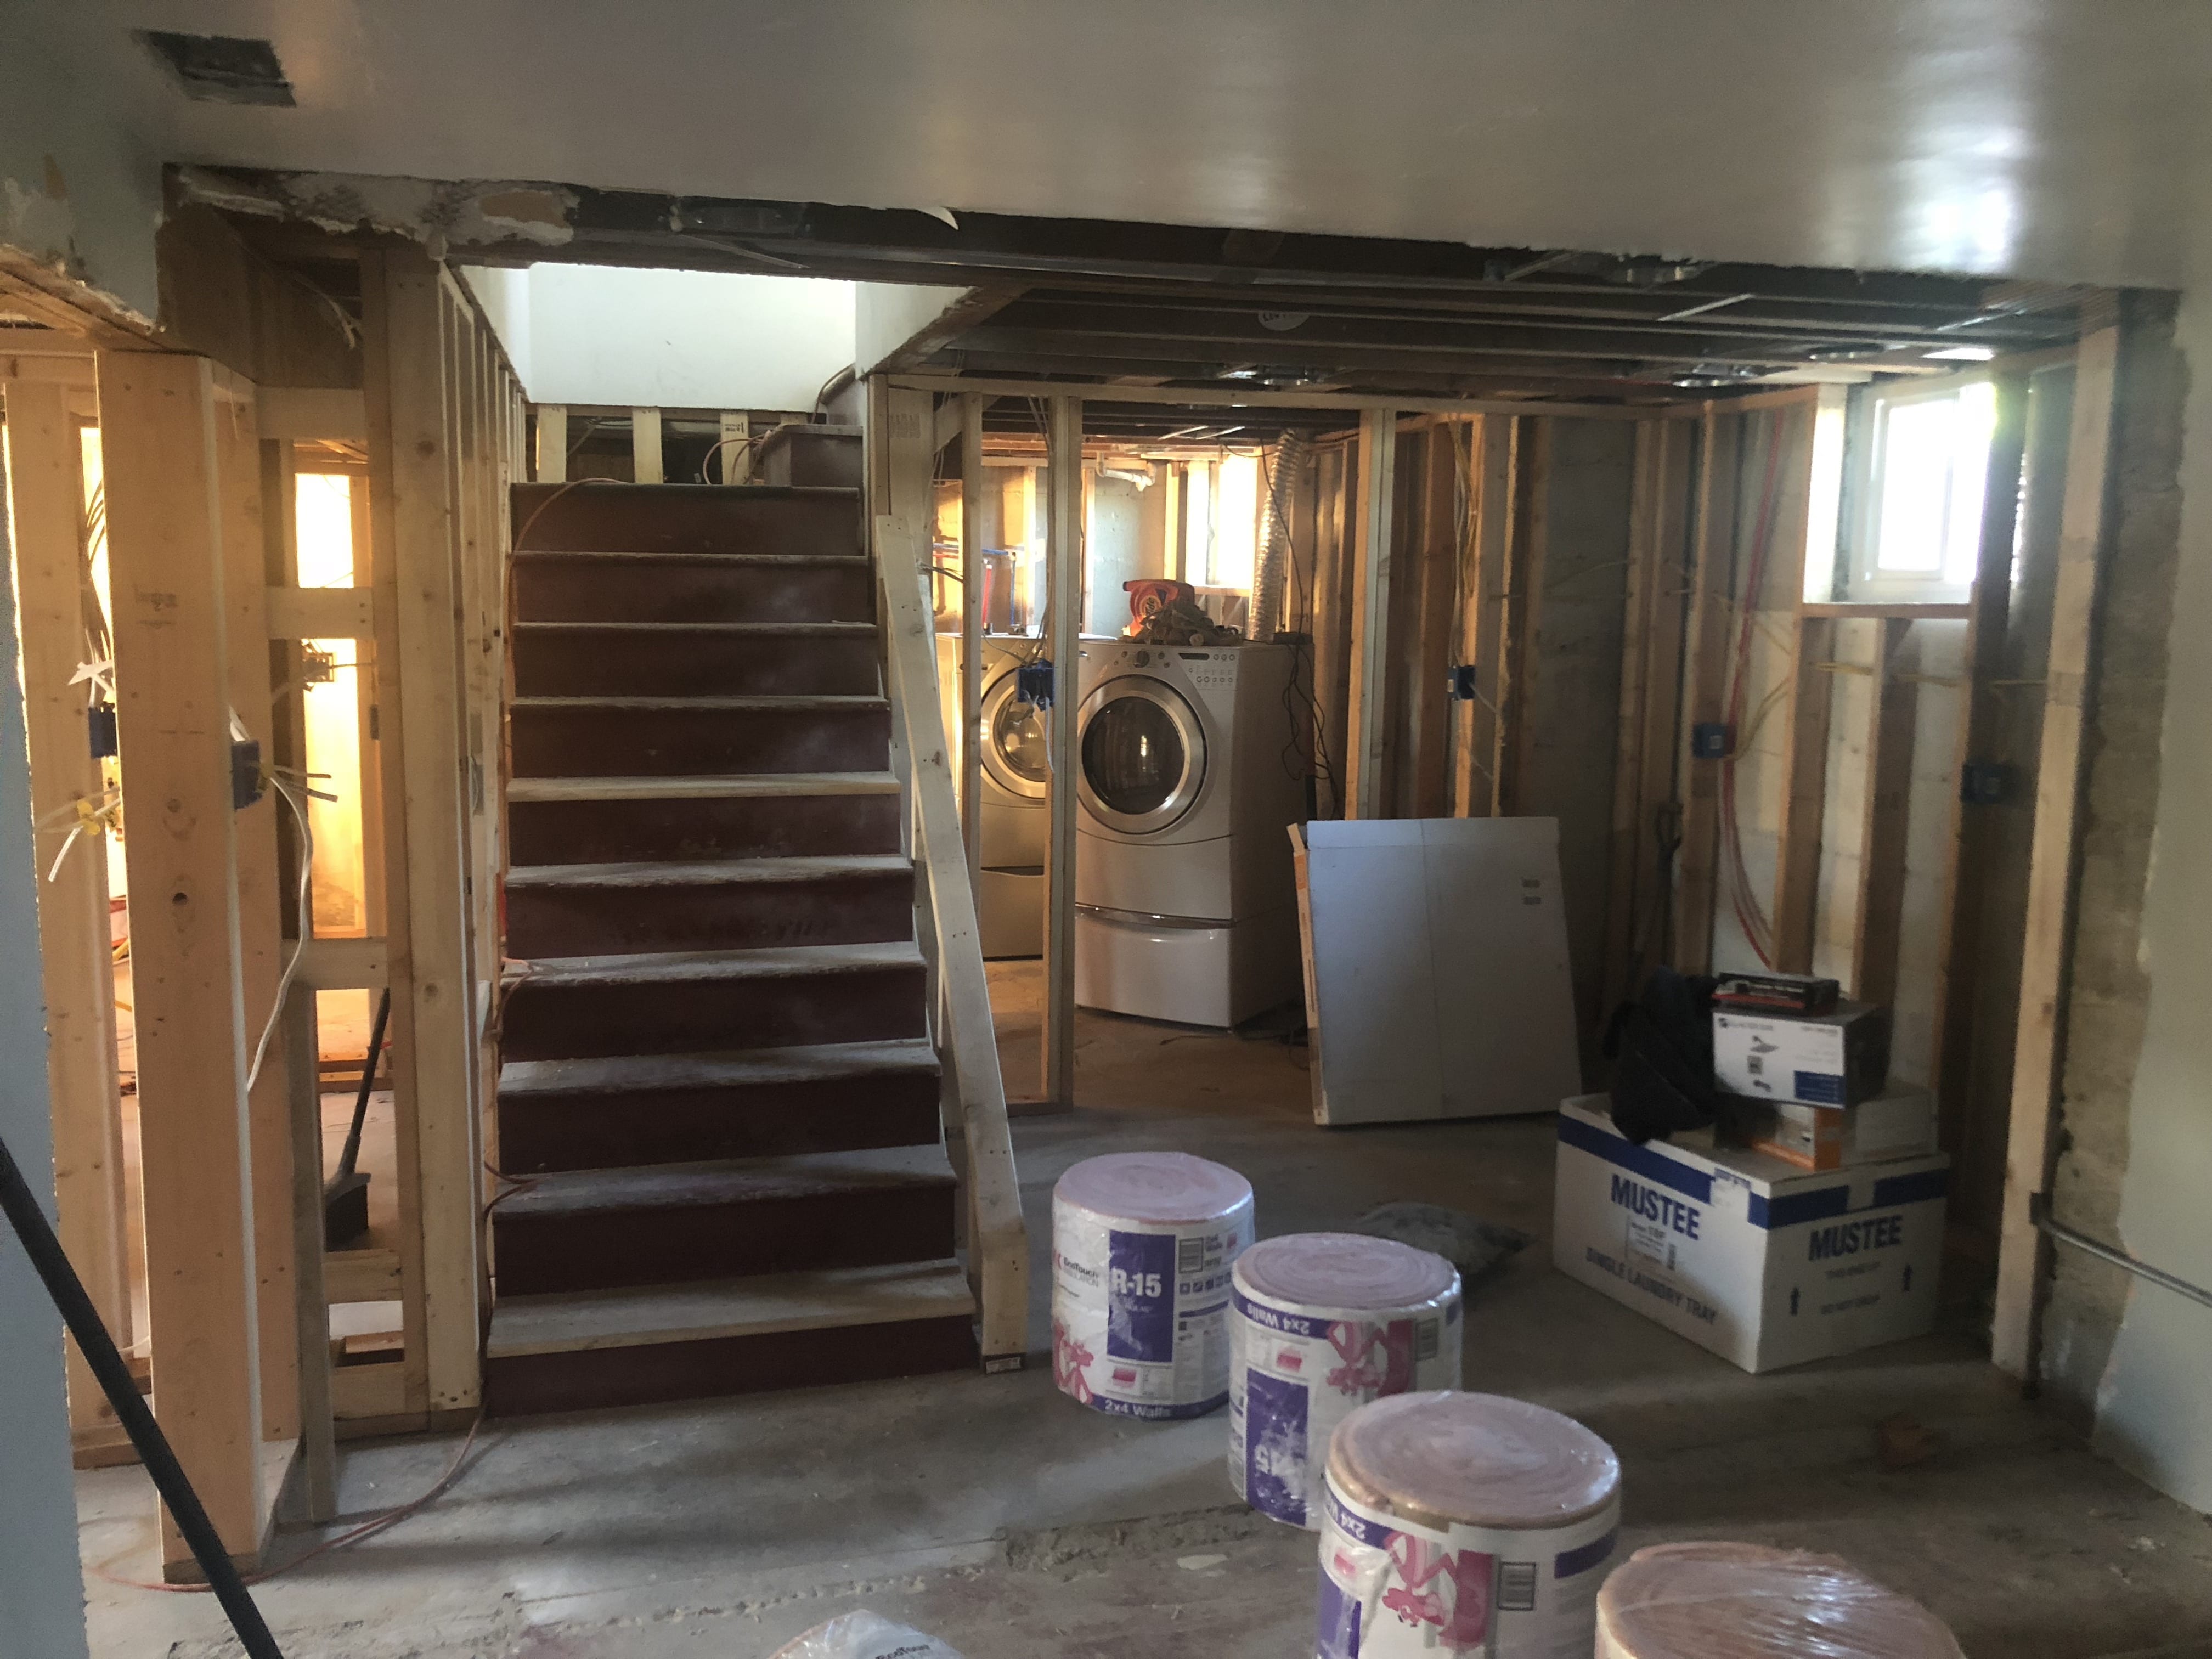
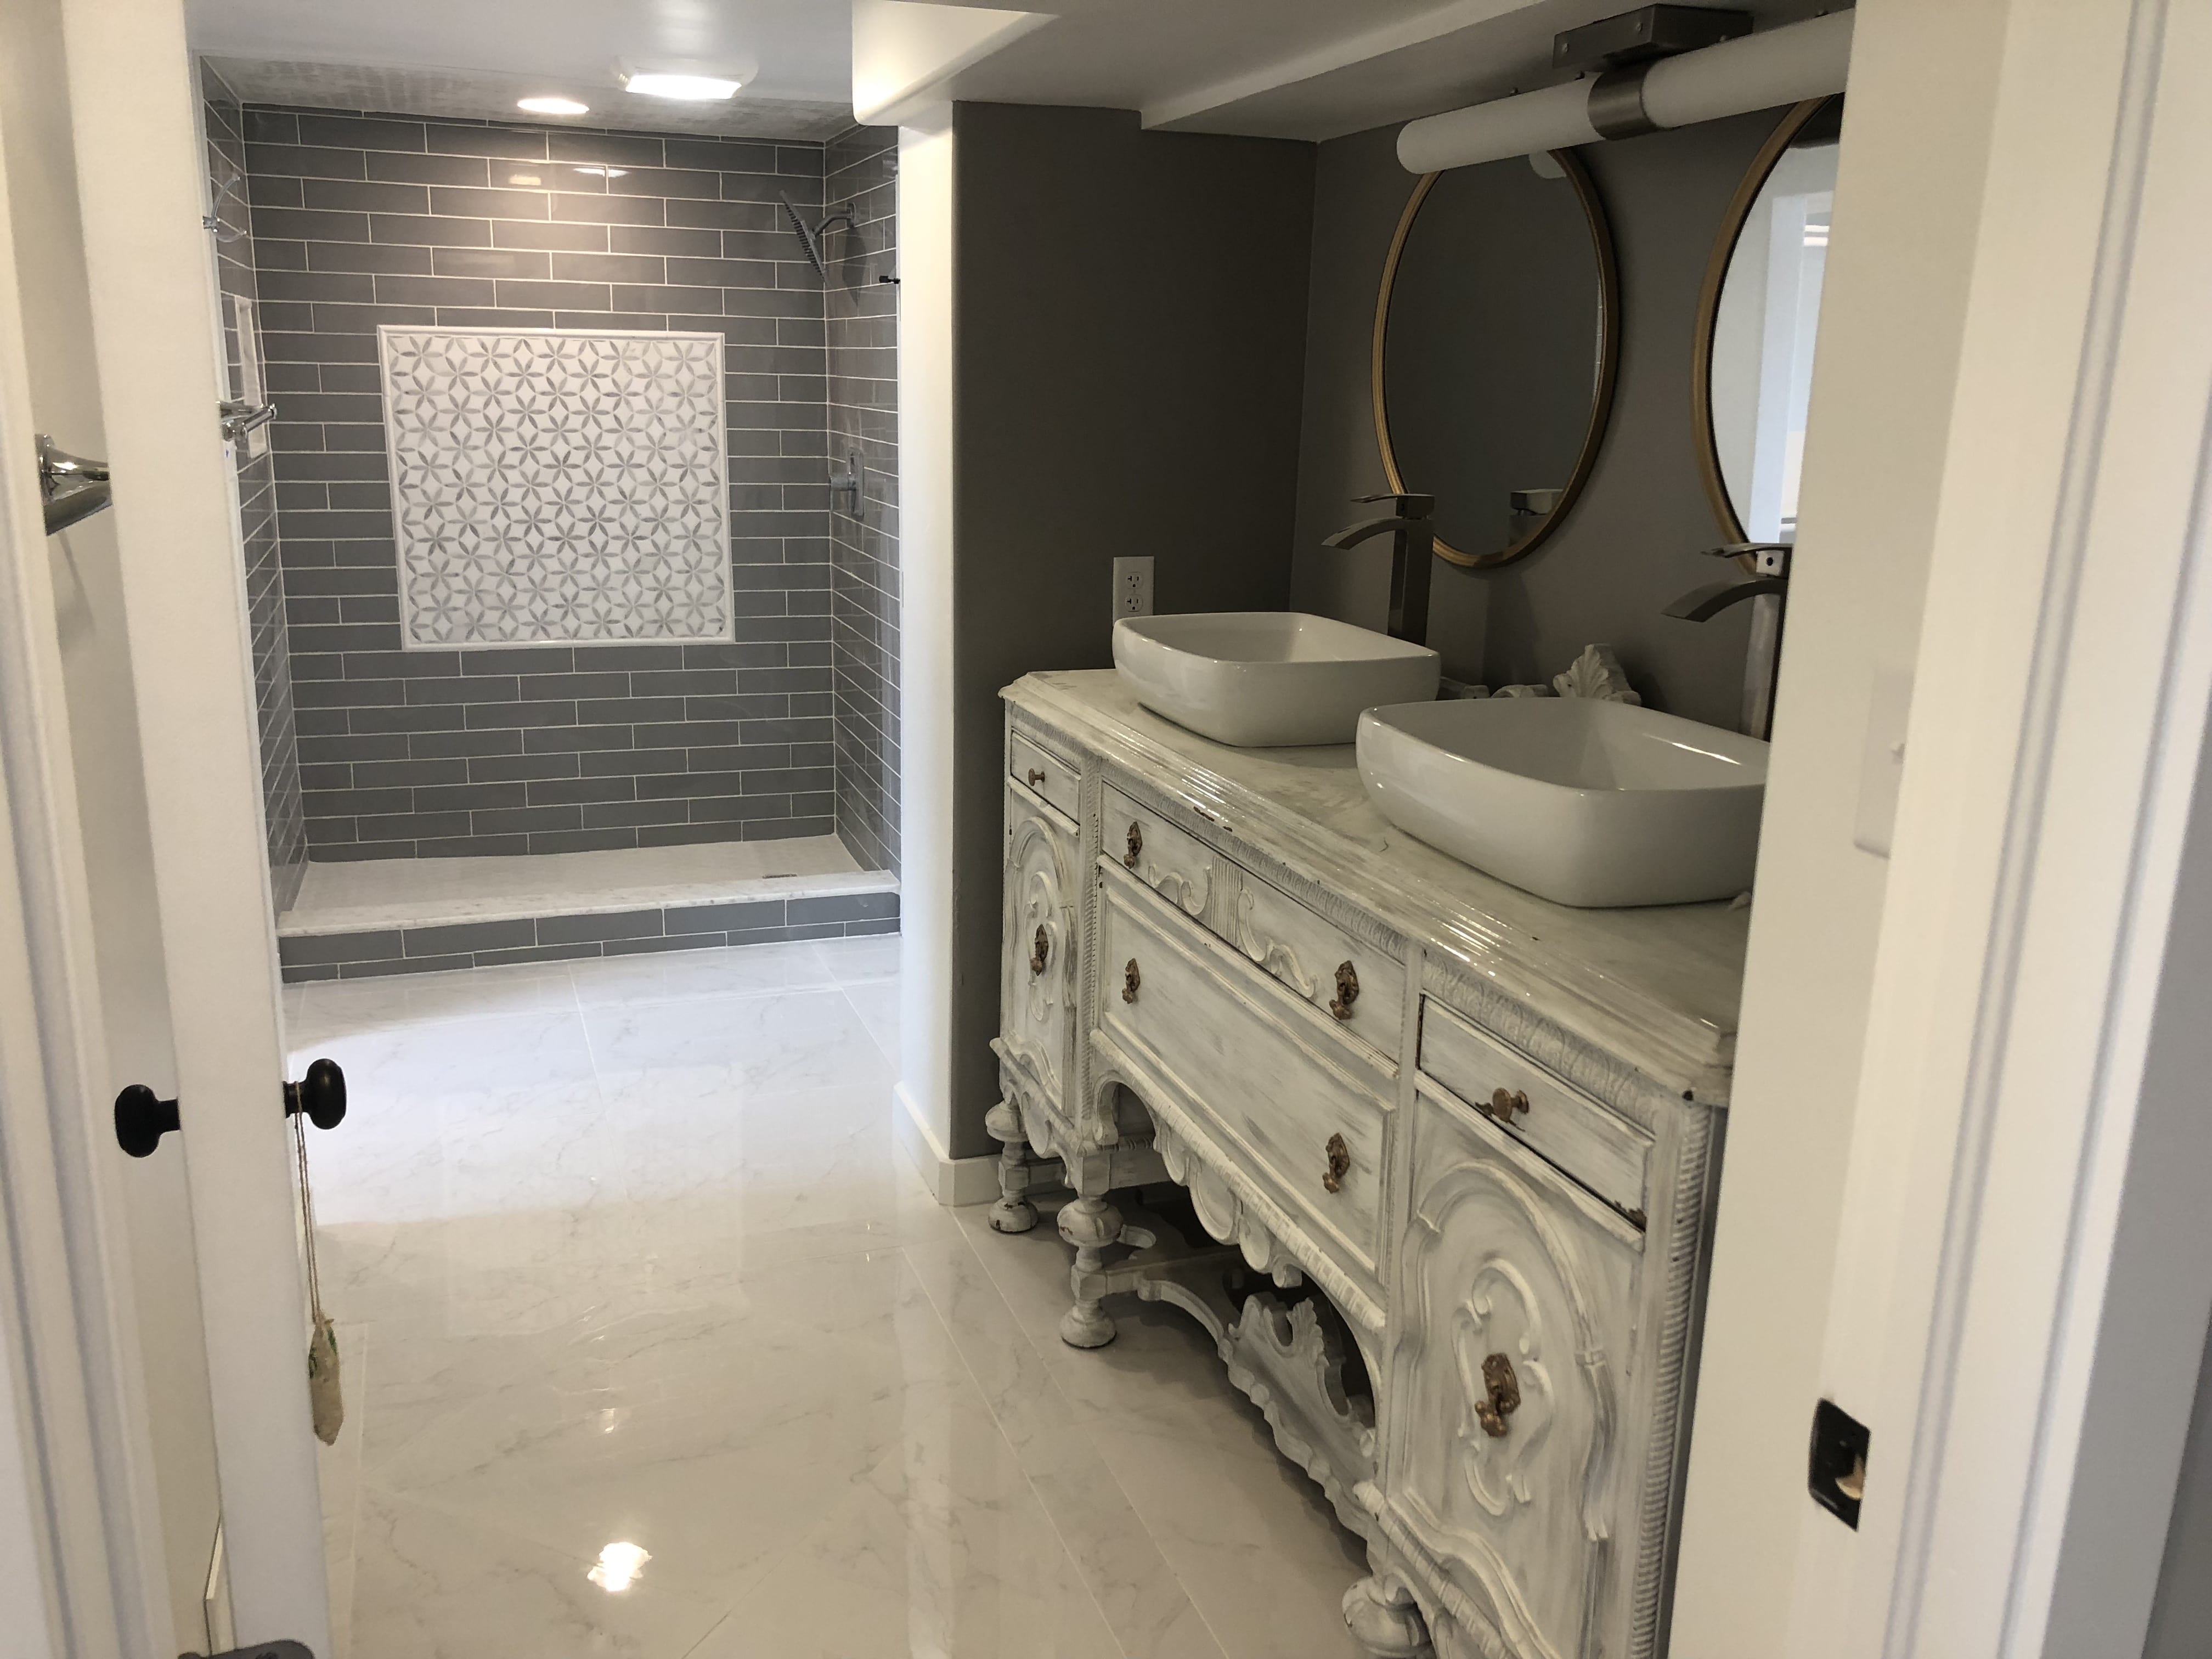
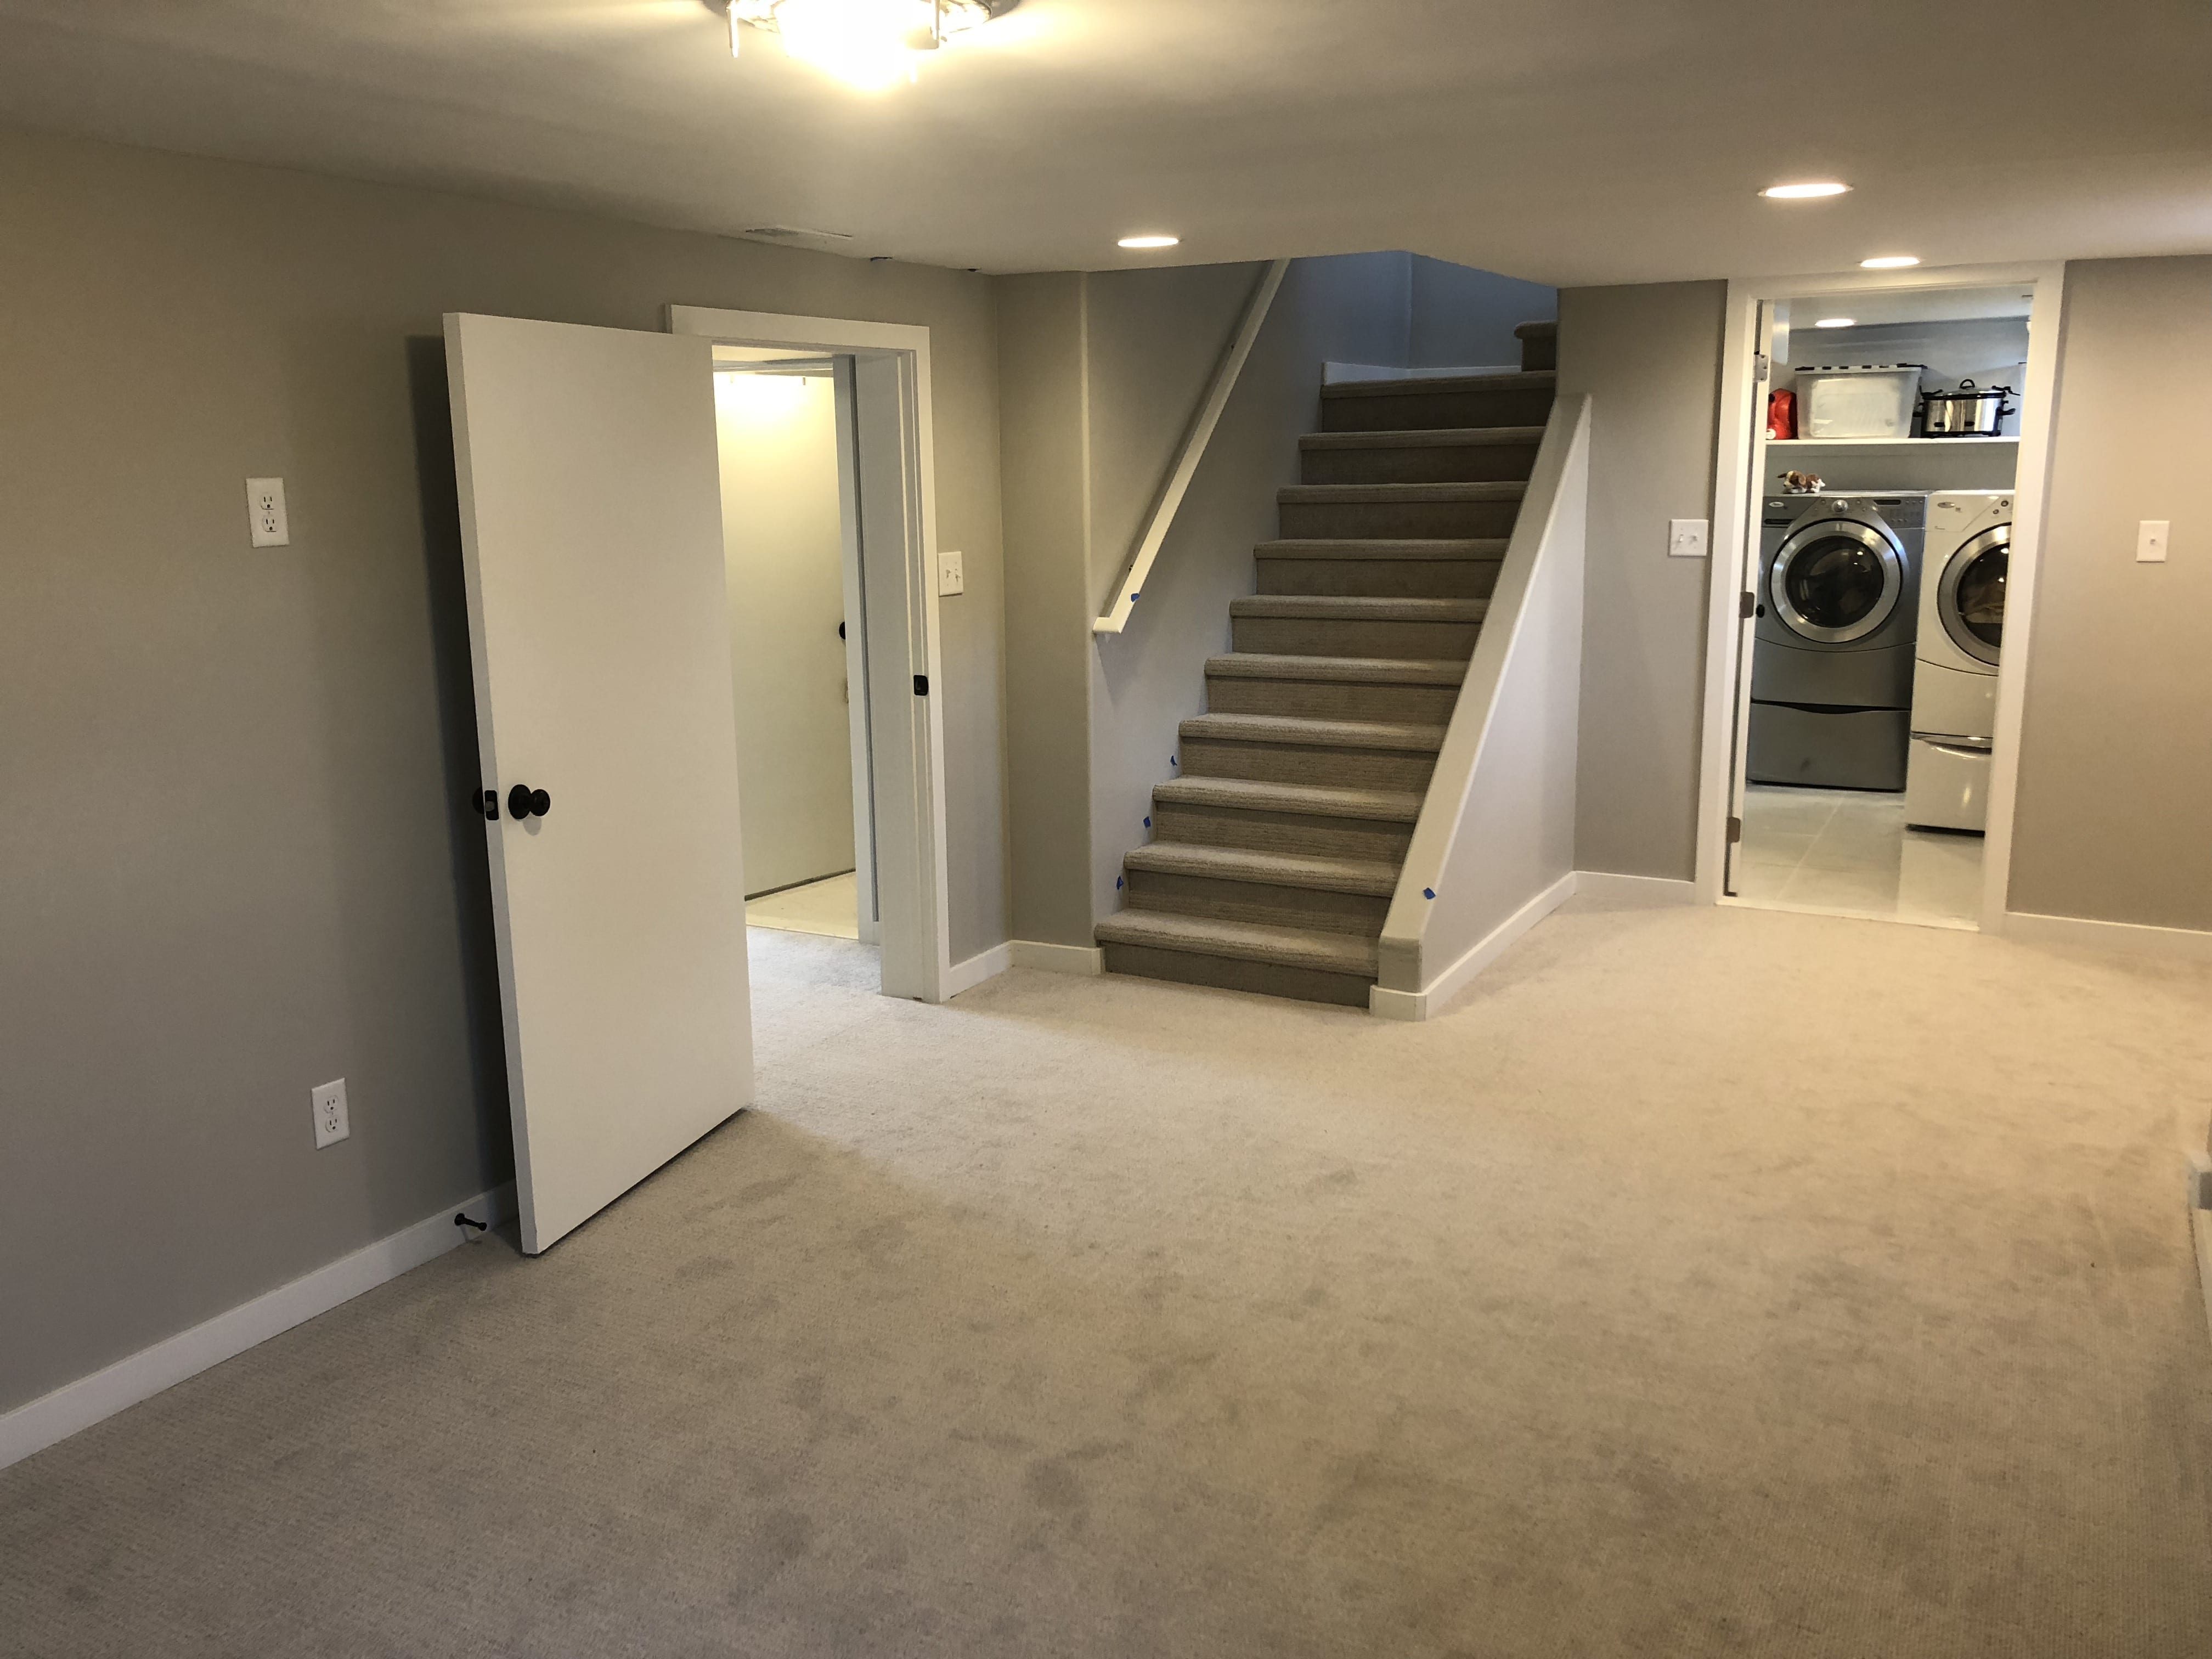
The scope of the full basement chronicled here was an 831 sq ft basement. The stairs open up into a den plumbed for a wet bar (I ran out of money so the wet bar is not a reality yet). There is a large master bedroom with an ensuite that includes a double vanity walk-in closet, and toilet room with dual access from the master bathroom and laundry room. The laundry room has a sink, front load washer and dryer, storage cabinet/ironing board, and under stair storage.
May this guide be a helpful resource as you begin your project. Please don’t hesitate to call me if you have any questions. I would love to help!
Best,
Kassidy Benson

Photos


A. Drawings
Create a well-thought-out plan detailing how you want the space laid out. Anything plumbing related needs to be in close proximity to your sewer mainline. Consult a plumber and HVAC professional to verify that your initial idea is feasible. I recommend doing this part yourself rather than hiring an architect so that you have the ability to adjust the plan easily as the project evolves. Measure each wall, windows, doors, etc. Use a program such a Sketchup or graph paper to draw out the plan as desired. Every contractor will need a copy of the plan with measurements to provide an accurate bid and execute your vision.
My sweet mother helped me with the design process. It took nine revisions to arrive at the final plan which was adjusted after the furnace was moved. Each revision would have been an additional expense which may have deterred me from the additional edits.
B. Permits
Plumbing, HVAC, and electrical work must be completed by a licensed professional. Your contractors should pull permits from the city. Inspectors verify the work and are meant to protect you from substandard contractors and foolish mistakes. Many contractors will try to convince you not to pull permits because it makes everything more difficult – it is already very challenging without this complication! Your contractor must be present for the inspection; the time window is 6 hours and there are inspections for each stage. The information from city personnel is not consistent, it depends on who you talk with on any given day. Also, many very experienced contractors do not have the credentials to pull permits with the city and the professionals who do can be very expensive.
C. Storage
Remove all personal items from the work area. Budget for storage; PODS and storage unit costs add up. I used the office/guest room upstairs and put durable items under a tarp outside. Get everything out before work begins!
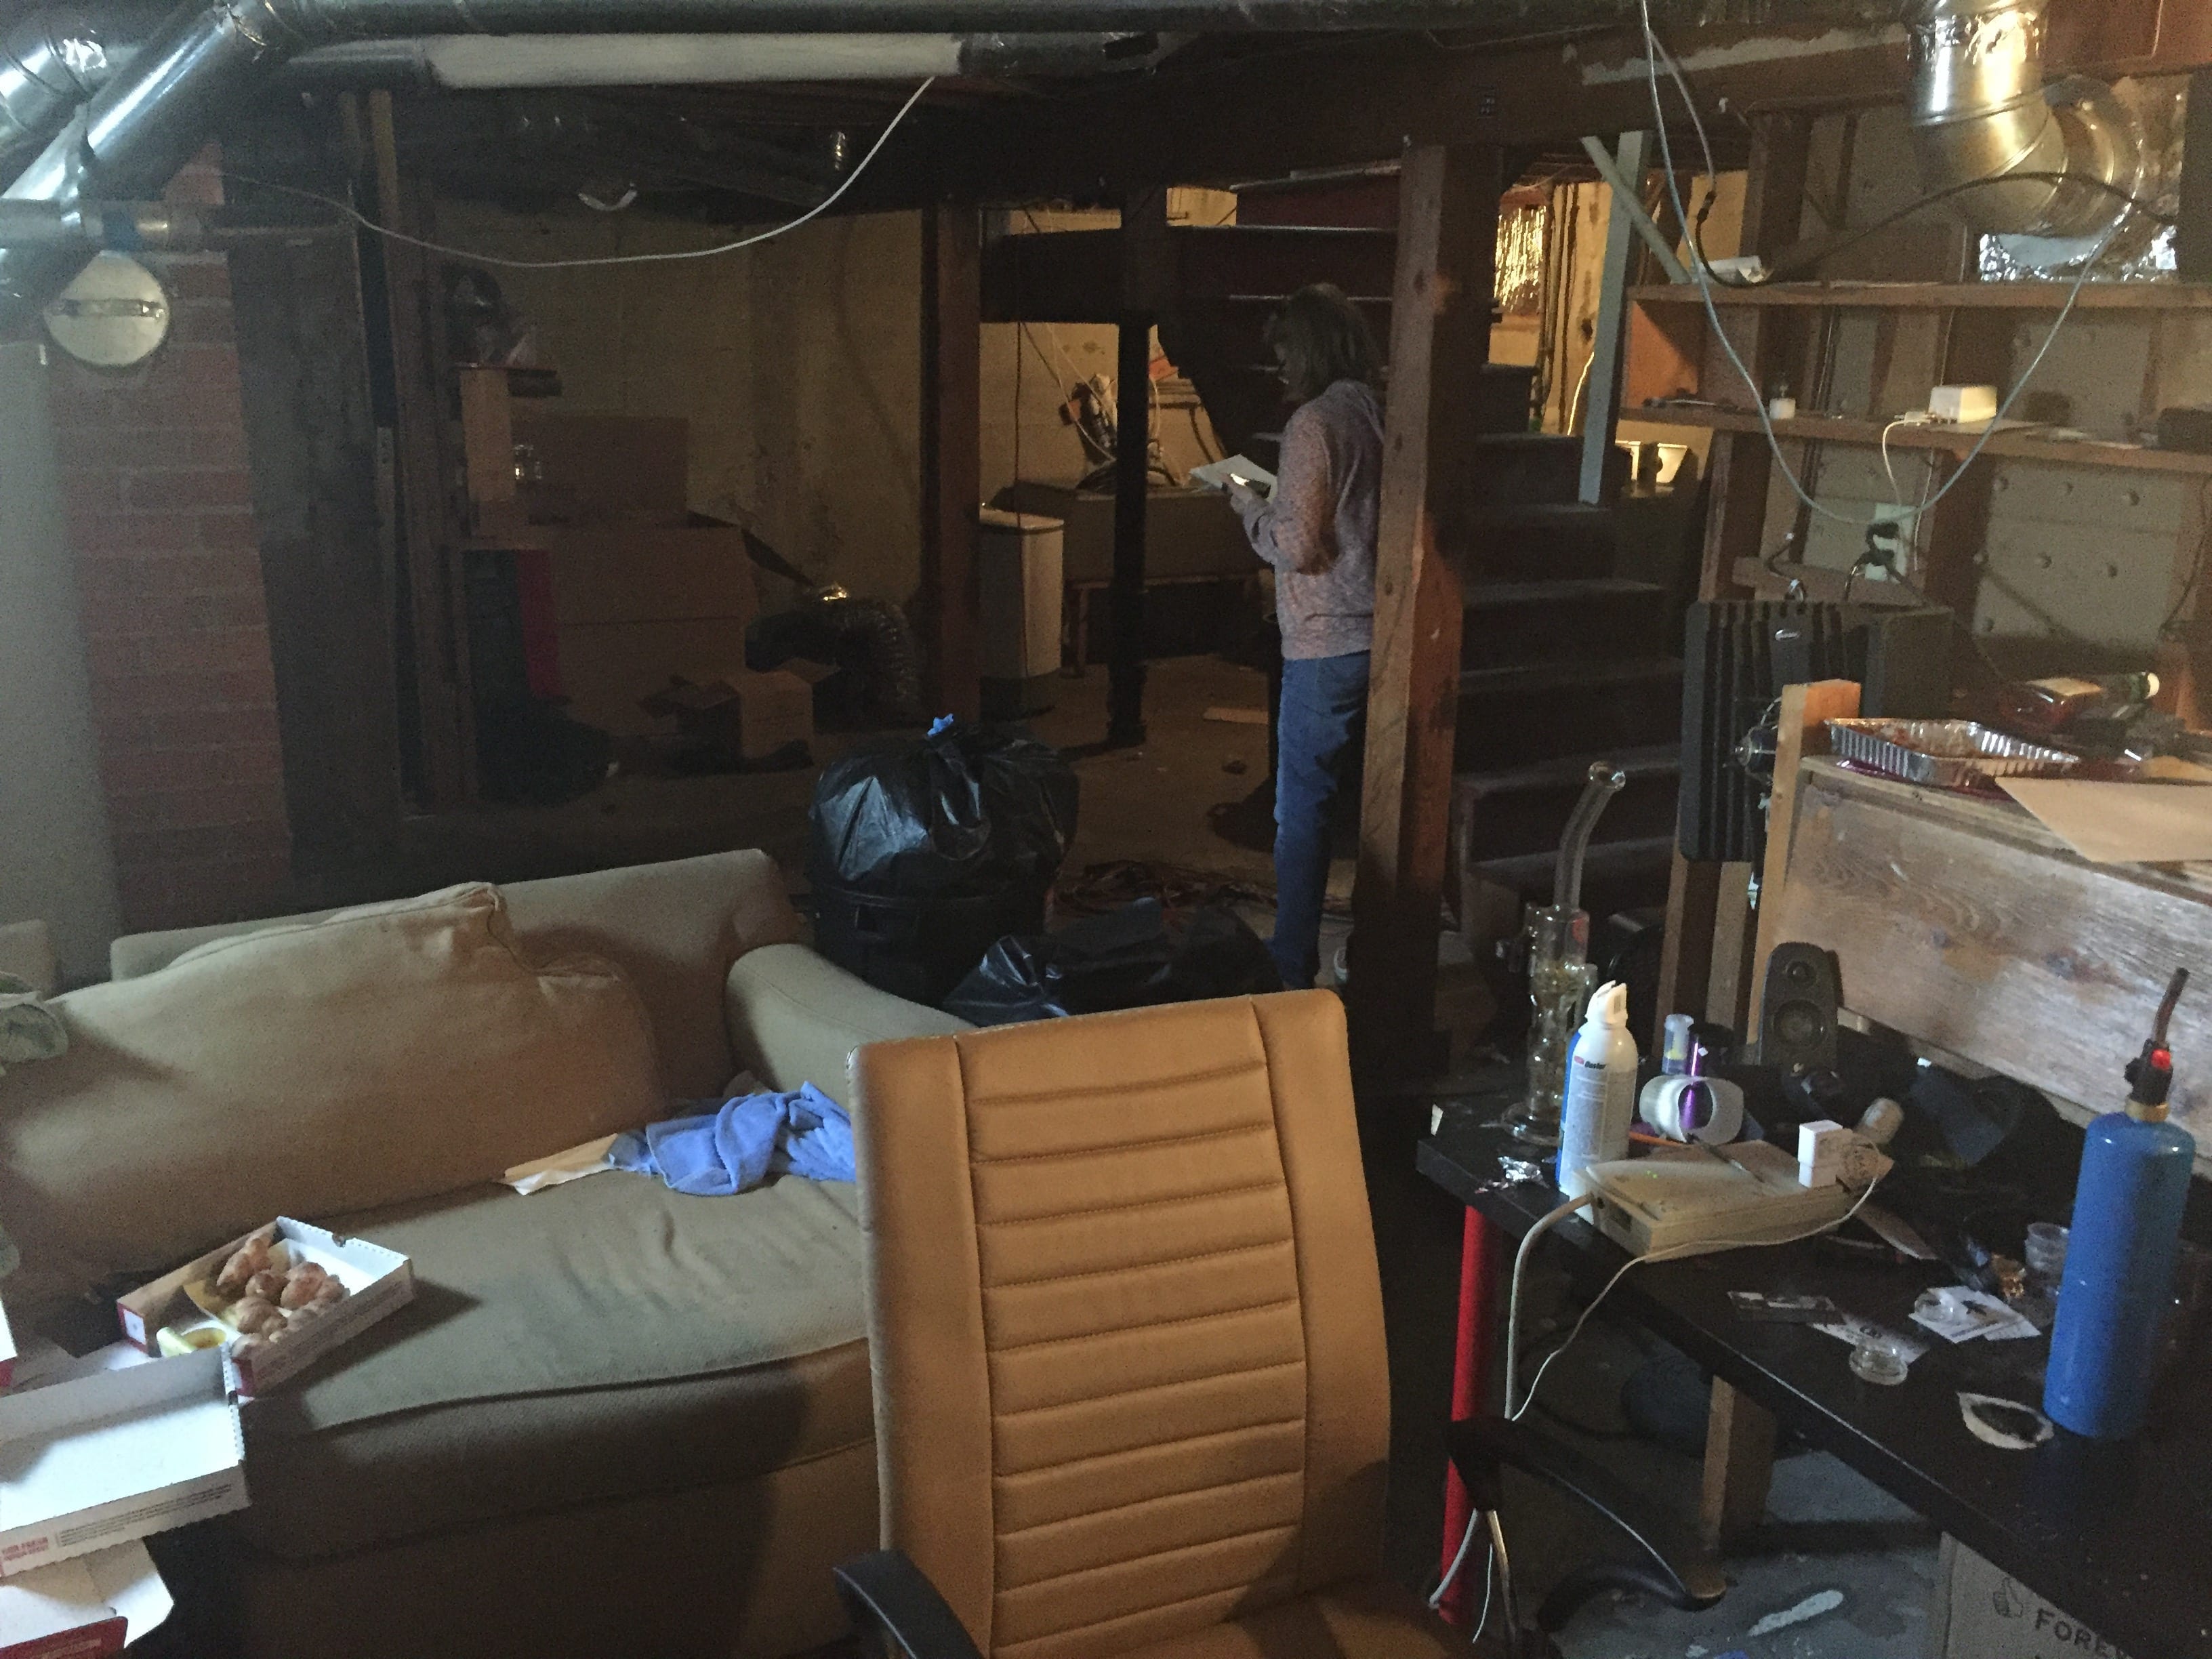
I left boxes and other miscellaneous items in the basement thinking they would be “out of the way” when the initial work started. My roommate was even still living there when work started. This definitely inconvenienced the workers and my roommate in a major way.
Cost - My sanity. I did not pay for a storage unit and piled everything up in my office instead. Living with this mess drastically decreased my productivity at work for three months.
D. Budget
Work out a budget for the whole project. I used a cost list from a contractor to figure out what the entire job would cost (appendix A). I estimated $35,000. I then talked to three general contractors who bid the full project. Their bids came in between $30K to $50K so I knew that I was in the ballpark. Only begin a project of this nature if you have enough cash available. You can potentially pull a HELOC to finance the project if you have enough equity in your home.

A. Define the scope of work
Create a simple written list of the tasks you expect each professional to complete and give it to them. Make sure you include the prep work, detailed list of each task, permit and inspection requirements, and finish work. Most contractors will have to return after drywall and paint to complete the “trim.” For example, the HVAC guys completed the vent work in May but they returned in July after the paint was complete to screw in the vent covers. During the next step you will discuss the scope of work with three contractors. These conversations may inform you of additional tasks to add to the scope of work. Make sure you take notes and revise the scope after each conversation.
B. Get three estimates
Finding good contractors in Denver was very challenging. Most contractors are skilled at what they do… not skilled at marketing themselves. Contractors with professional advertising tend to be very expensive which makes sense. I found affordable contractors by asking friends/family, realtors, and looking on www.nextdoor.com. I recommend finding at least three professionals who will provide bids with a clearly defined scope of work. This way you’ll be comparing apples to apples at the end of the three estimates. The three perspectives and prices will prove to be very valuable when establishing the final contract and agreements.
Remember that people are predictable. Watch very closely because the contractor will tell you everything you need to know about working with him during the interactions of scheduling the estimate, walking through the home, and sending over the estimate. If they respond quickly, that is a great sign! If their estimate is not detail oriented, you should not expect detailed work! If they blabber on and waste your time, this is also a sign of what is to come if you choose to work with them.
C. Establish a Written Agreement
Establish clear agreements when you negotiate price and terms with the contractor you eventual decide to hire. Issues will always come up, so make sure that at the onset the terms are agreeable so you do not have to micromanage. I’ve created a template contract (appendix B) that you may find useful. Important terms such as start date and completion date, waste removal, and a payment schedule will come in handy. The established written agreement should also cover materials, delivery, waste removal, and warranty covered in the next three sections.
– Materials and Delivery
I recommend paying for materials separate from labor to avoid overpayment. Work with companies such as Home Depot that make it easy to order the materials needed by the contractor and pay over the phone. I found that purchasing fixtures on Amazon.com gives you more options and is more affordable than Home Depot. Transportation and delivery of materials can become very time consuming, expensive, and can delay your project. Talk with supply warehouses and to contractors to make a plan for material delivery during the written agreement stage.
My framer did not have a vehicle to pick up lumber, doors, and trim. So, my window guy volunteered to help me pick up the doors, but one of them went missing between the warehouse and when the job started. Where did it go? Who knows, but I paid for it and also the replacement. It was accounted for at the warehouse so the door place did not refund me. I can’t blame the guy who delivered them as a favor for free. I didn’t account for them until weeks later. Material theft is a common problem on job sites, be aware.
– Waste Removal
Go with the expectation that contractors will NOT pick up the debris they leave behind unless otherwise stated. Rollaway dumpsters are cost prohibitive for a three-month basement remodel; they run about $300 for a week rental. A good solution is to let all the contractors know to stack their debris in one place that is not an eyesore for your neighbors and would be an easy location to load a dumpster or have a junk removal business pick up. I used a junk removal business because it was about the same price as a rollaway but I didn’t have to schlep all the trash into a dumpster.
Cost: $660

$200 (May) - remove debris from demolition and concrete sink

$200 (June) - remove debris demo framing and plumbing

$260 (July) - remove all large piles of trash from site including drywall, boxes and paint
Junk Trunk
Nathan Schweid
303-815-0467
Alternative: I could have piled everything in one place and waited until the end to pay for one large rollaway for $350 and loaded it myself.
– Warranty
Make sure your contractors stand by their work with at least a one-year warranty. They should come back to make the necessary repairs so that everything is in working order. Be patient, they are doing their best and getting mad and writing a shitty review will not help your situation.
My HVAC contractor had to come back over five times to get my AC in working order. I was roasting, but tried to keep my cool! They changed the electrical, switched the condenser, bought a new thermostat, and added new duct work.
After the plumbing fixture was installed, we found that the shower floor was not properly sloped – leaving standing water. My tile guy came back and ripped out the floor, reworked the floorplan, and then retiled the shower floor. He paid for all the material and spent two full days working to make it right.

A. Plumbing
Existing Plumbing
During phase one of my remodel I replaced the galvanized pipes running throughout the property with PEX. PEX is a plastic plumbing material that is commonly used for plumbing now. Before finishing a basement, I advise updating the plumbing. Galvanized pipes corrode from the inside and will eventually completely constrict flow and may contaminate your water. Lead pipes contaminate your water and cause health concerns. When the basement was unfinished, we had easy access to all the plumbing in the floor.
Cost: $3712.66 for replacing all the galvanized pipes, installing fixtures in the kitchen, and the bathroom.
Adding Plumbing in the Basement
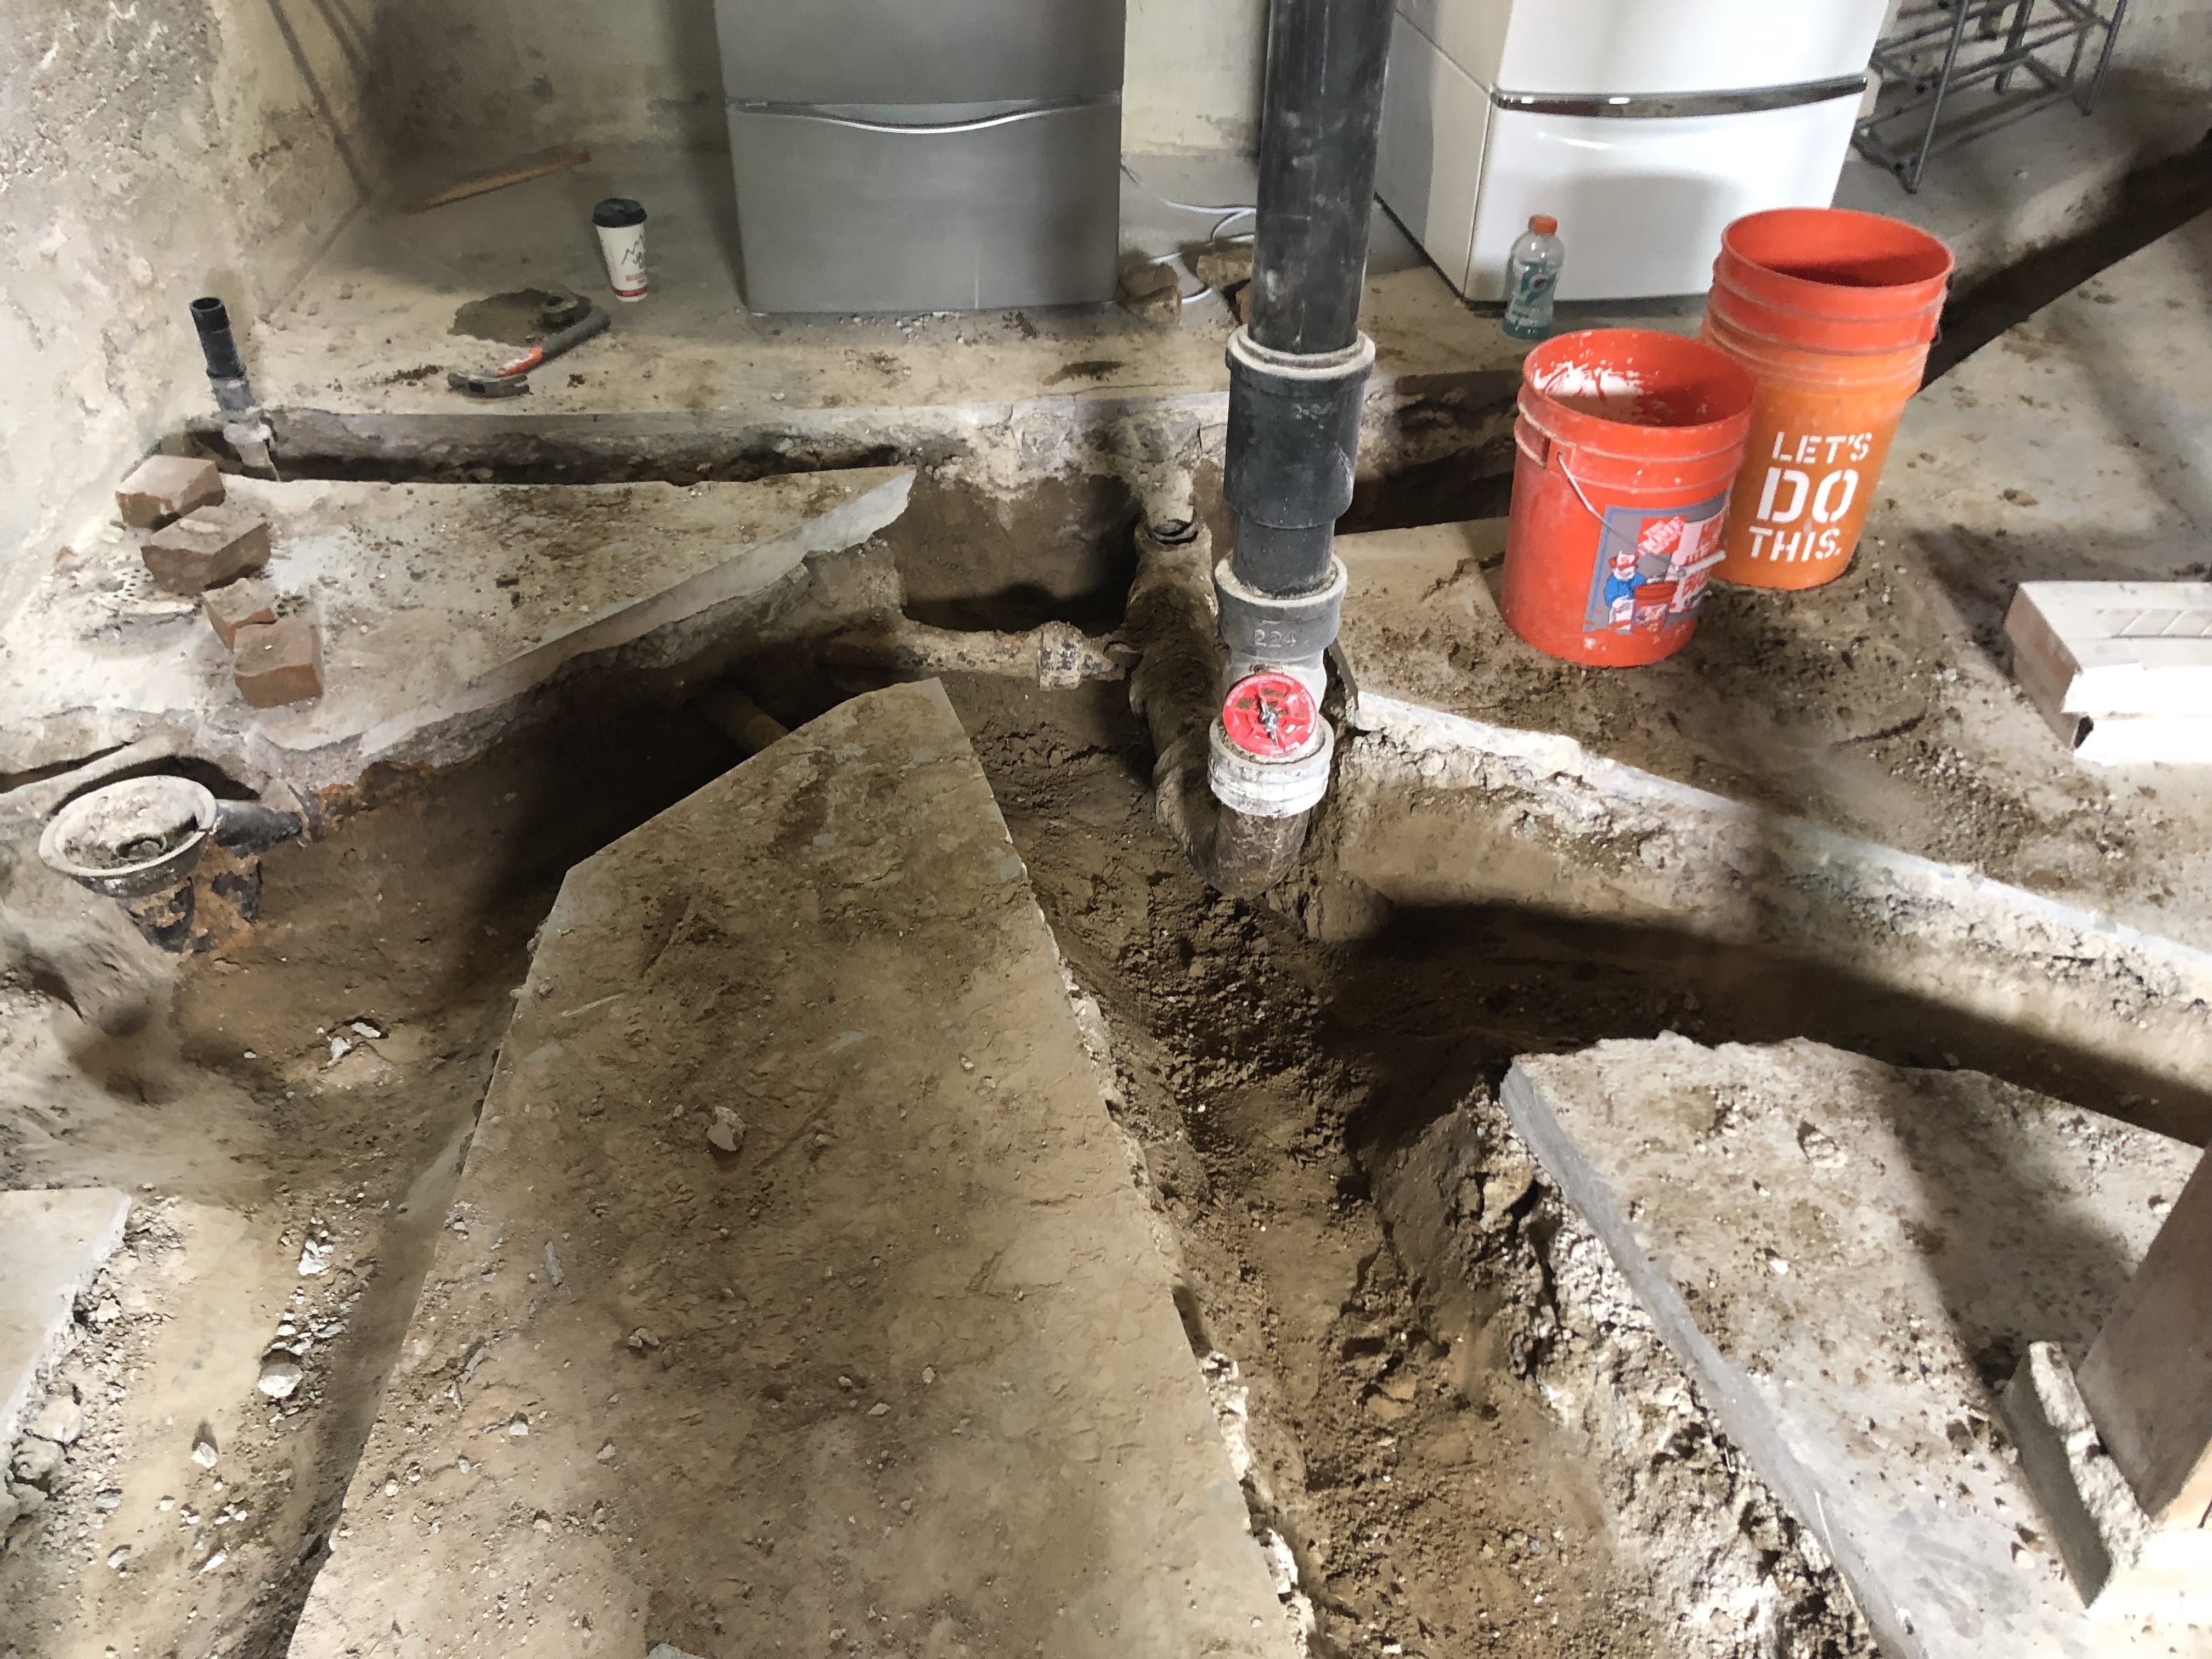
Based on my plan, my plumber came over and drew lines on the concrete floor defining where his drains would need to run. Drains were required for the toilet, vanity, hot water heater, shower, washer, laundry sink, and wet bar. Start around the mainline to make sure you have enough depth under the concrete to connect your drains. For every foot of run, you need an inch of depth. My mainline only went about a foot under the concrete which limited my longest run to 12 feet.
Using the lines the plumber defined, I hired a laborer to come cut and jack hammer out the concrete paths. This is very back breaking labor! The concrete work left a ¼ inch of fine concrete dust on everything I own! Make sure you cover vents and use plastic to block off doorways. Worker should be wearing a mask and protective eyewear.
After the concrete is jackhammered out, I hired a laborer to dig trenches in the pathways from Craigslist. The laborer piled the dirt in the basement because we needed it for later to refill the trenches. Then the plumber returned to install all the drains. The laborer returned to fill in the trenches with dirt. He used a mallet to compact the dirt around the pipe and a square dirt tamper to compact the dirt into the trench.
The plumber will return later after the framing is complete to install water lines.
Cost: $1500 (Labor)

$600 cut and jackhammer concrete

$100 cleaning person for the dust

$300 dig dirt out of trenches for plumbing

$500 fill in the concrete (window guy did this while he was doing the egress window)
Other quote: $1200. I went with the cheaper guy because he said he could do it for $600. It turned out to be a very tough job and he was only about to get halfway done on that budget and he made a huge mess. I had to hire another person to come do the digging and a cleaner to take care of the dust.
B. HVAC
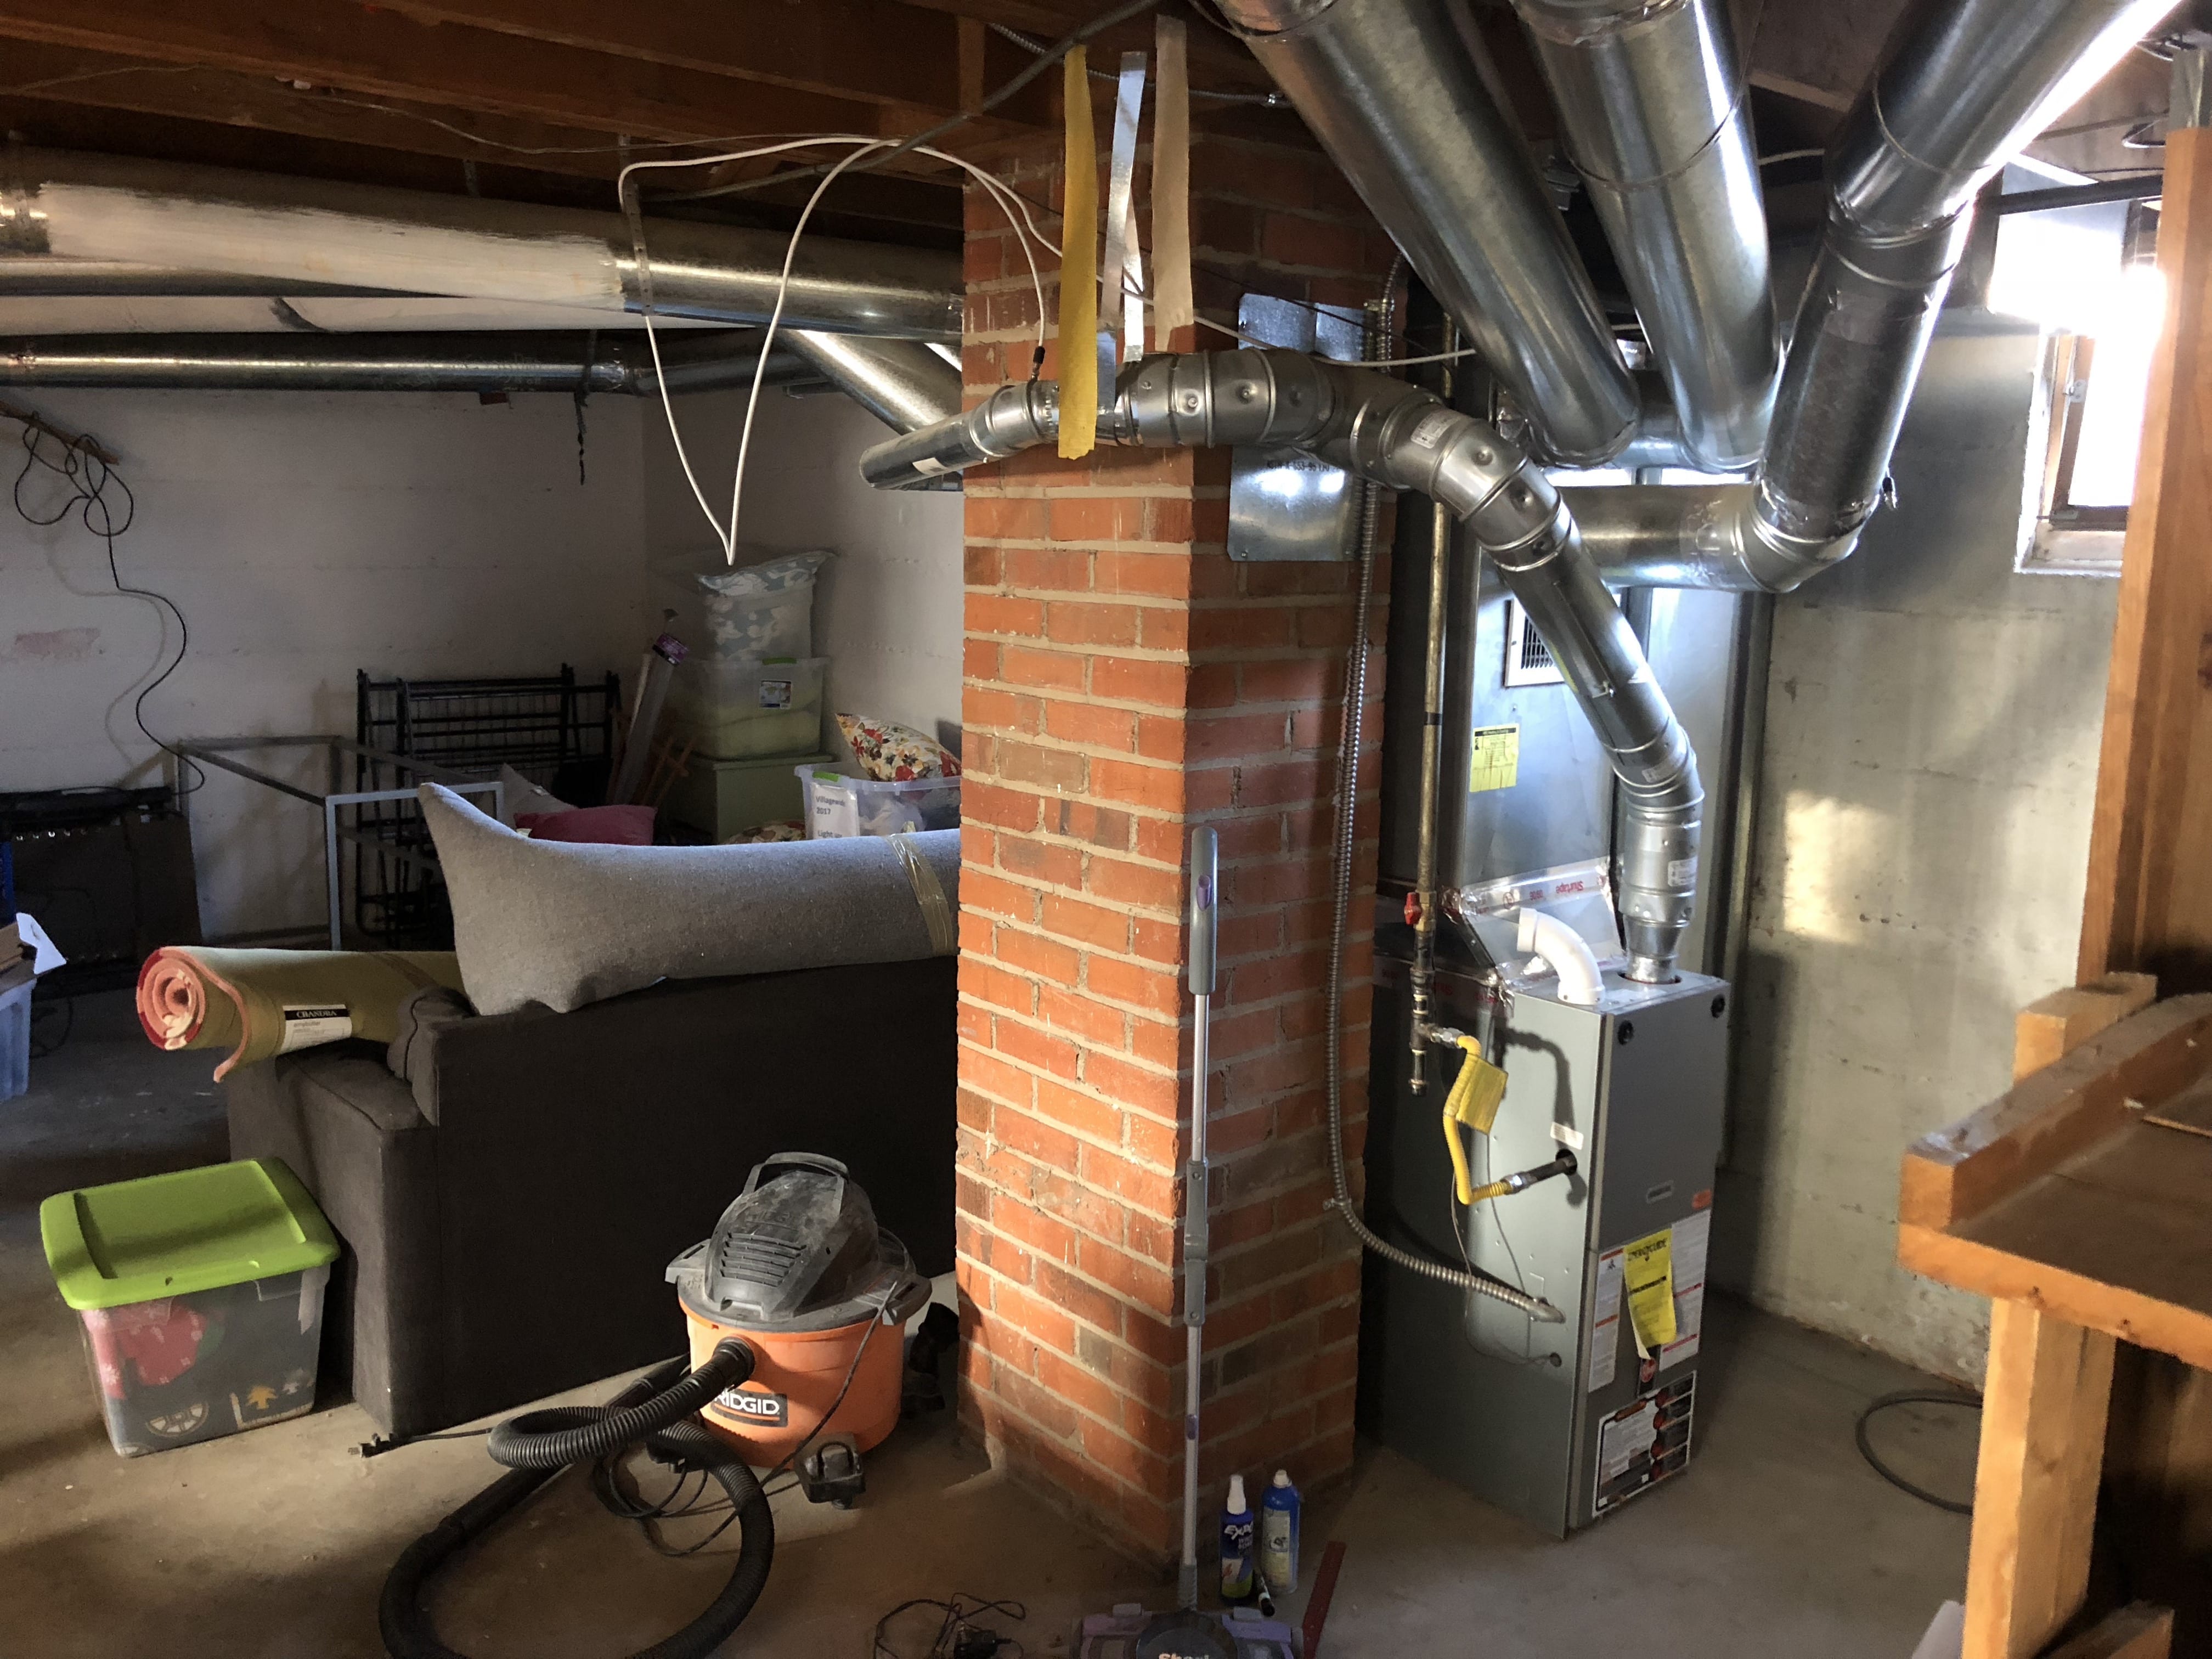
The duct work in my basement was not tucked away in the ceiling joints. Without proper ceiling height, the space is not habitable. The City of Denver requires a minimum ceiling height of 7 ft. After many conversations with three HVAC professionals, I decided to run the main airway (trunk line) through the middle of the space near a structural beam where it was already low. Branch ductwork runs from the main trunk line up inside the beams into each room.
Step one was moving the furnace closer to the center of the home to accommodate a central trunk line. Then every inch of existing ductwork for the whole house was removed and air intakes were reworked. All new lines ran from the central trunk line up inside the beams. There is at least one vent in every room. The HVAC contractor also added two “fart fans” one in the toilet room to remove smells and one near shower to removal moisture. These require drilling holes through the brick to the exterior. I also decided to add an air conditioning unit to cool the home. The HVAC contractor scope should also include the dryer vent.
Cost: $7000 (Material and Labor)

$3000 - Move furnace, all new ductwork throughout, bathroom venting, dryer vent

$1000 - new water heater

$3000 - Install AC

Other quotes: $20K and $12K
C. Windows
I used Cascade windows which are mid-grade quality, double pane, and vinyl. The window estimators measure each window and submit the measurements to the window company who gives quotes for the different brands of windows. Make sure you order the correct sizes!
My window guy ordered windows that were slightly too large and he had to cut out the concrete around each window to make them fit!
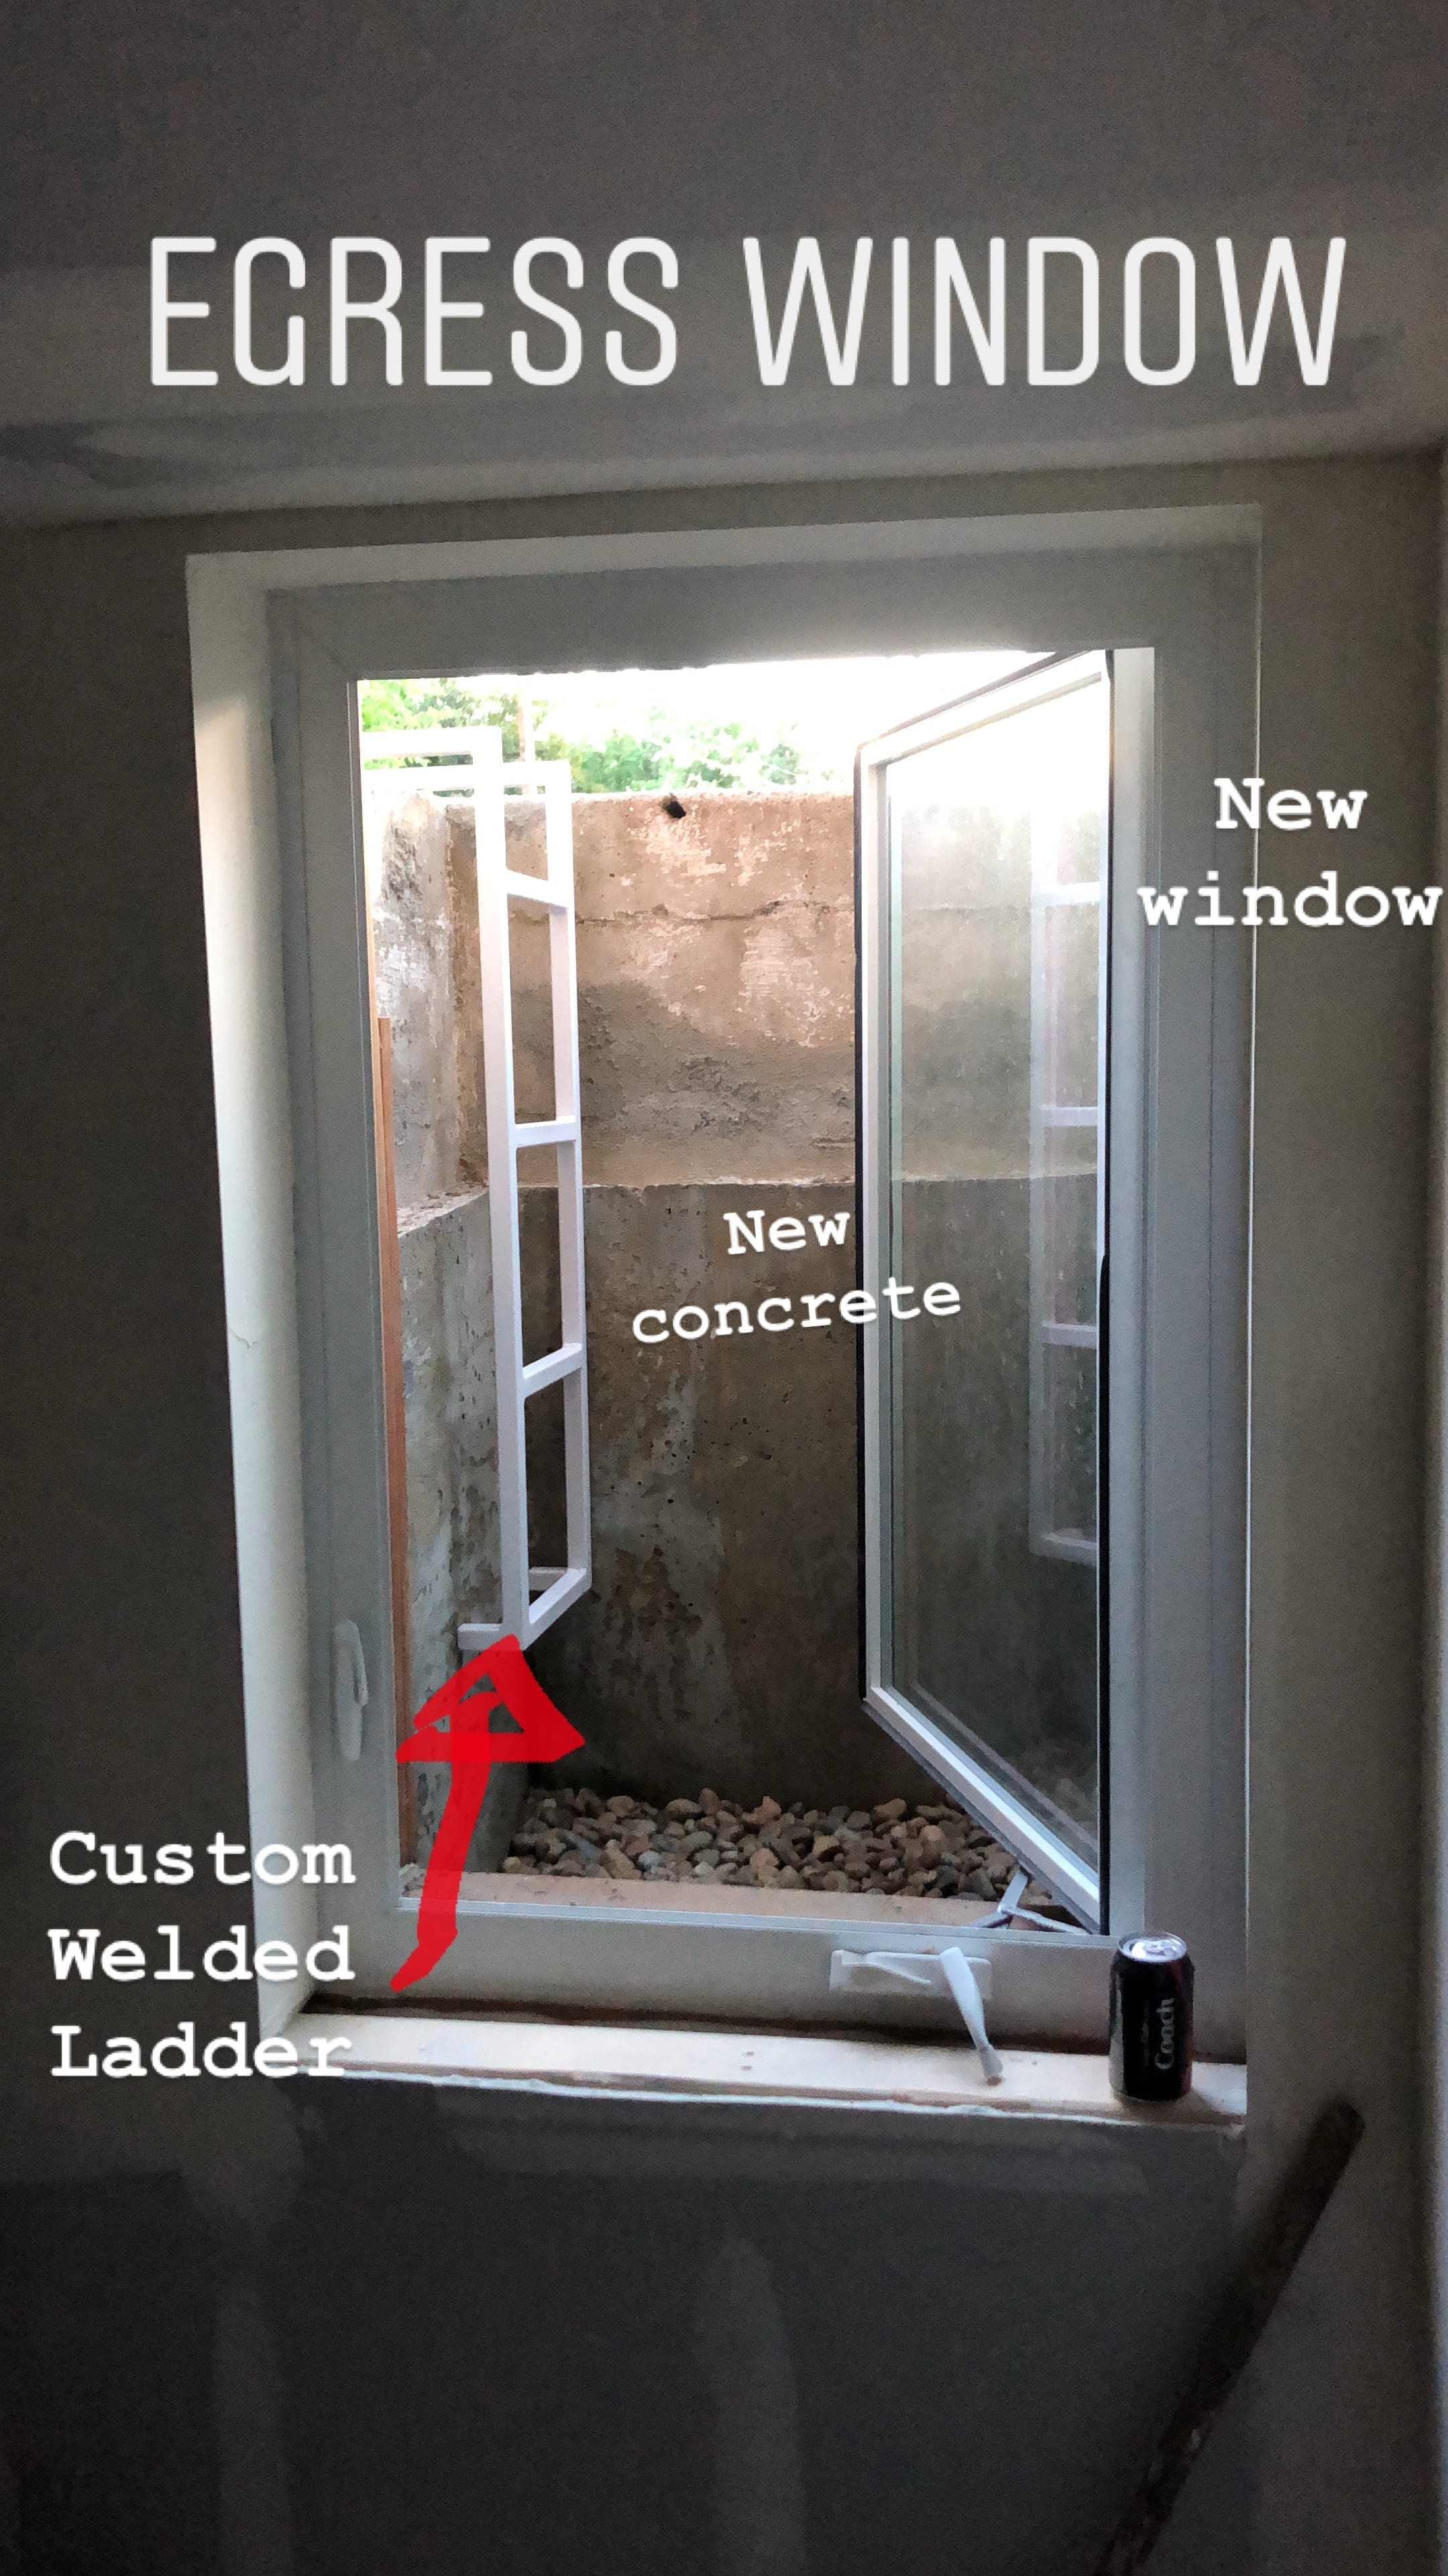
In a basement, you must install at least one egress window in each bedroom. Window wells must provide a minimum area of nine square feet with a minimum dimension of 36 inches and shall enable the window to open fully. If the depth exceeds 44 inches, you must have an affixed ladder.
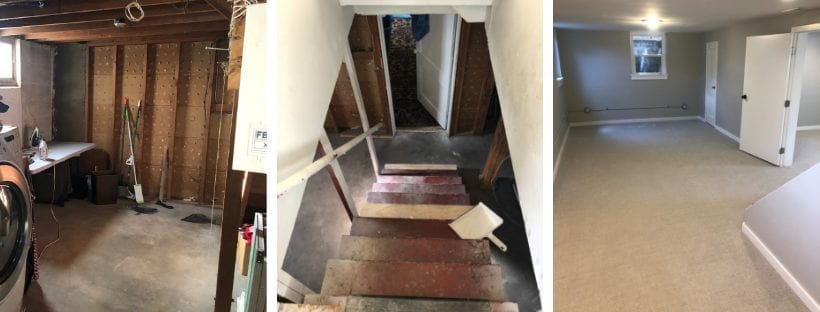
The existing basement bedroom had a window with a deep window well that did not meet the requirements. Since I had to do a new egress window anyway, I changed the layout and made the existing bedroom into a den. I installed an egress style window in the den because it was only slightly more expensive. In the new bedroom a 12-inch basement window was made into the 44-inch deep egress window. You must pull a permit through the city in order to dig an egress window to verify you will not affect a buried sewer, water, or electrical line.
The contractor started by cutting the concrete from the inside. He then removed the concrete and dirt to the depth of 44 inches. He installed a window that opens out similar to a door. Instead of using rounded metal commonly used, he poured concrete in a mold to keep the window well consistent with the other four basement window wells. Since he was mixing concrete, I had the window guy also fill in the areas on the floor where the concrete was removed for the plumbing drains.
Cost: $3865

Material - $1242 (6 new windows; 2 egress - $300 each and 4 small basement size - $125 each)

Labor - $2622 (The original estimate for labor was $1400 but it went up significantly because the window guy ordered the wrong size windows and totally underestimated the work required to do an egress window. We also added the concrete labor and material)

Other estimates: $3000 just for the egress
Nicky’s Windows and Doors
720-287-4018
nickyswindows@gmail.com
Drew Wilson
D&D Exteriors
720-323-6497
D. Framing
Basements should have “floating walls,” meaning there is a 1.5-inch gap between the anchored floor plate and the framed wall. This is city code for basements because if the foundation settles there is some give before everything starts to crack and crumble. Protect your foundation from settling by keeping water away from your foundation with proper grading, drainage, and gutters.
This is an exciting step where your plan becomes a physical reality. All the exterior walls need to be framed in to hold the insulation, electrical, and plumbing. Framing will also wrap the duct work. I learned that old houses don’t have straight walls and wooden lumber is usually not completely straight either.
Make sure the framer makes a little cutout in the shower to hold shampoo. I also wish the framer would have framed the shower away from the beam so that we could have put the shower head higher.
Cost: $3500 (material and labor)
E. A Little More Plumbing
Once the framing is complete, the plumber came back to install all the drains and waterlines. The plumber reworked the mainline to give me more room in the toilet room. I paid the plumber in full at this point even though he would need to return at the end of the project to install the toilet, fixtures, and sinks.
Cost: $4800 (Labor and Materials)
Tommy the Plumber and Lisa
720-877-5634
F. Electrical
The electricians were very thorough; they walked me through the plan and we talked about placement of every light switch, light, and outlet. Because the ceiling height was a concern, I used can lights throughout the basement. They added a new sub panel in the basement to accommodate all the new electrical. You will need to select light fixtures in advance. Above the vanity I selected one light fixture that was not a can light after the fact. It did not fit well and the electrician had to come back to alter the fixture placement. You will also need to pick your style preference for switches and cover plates.
Old homes are a pain for electricians so plan to be charged a premium. They had to connect to a light switch on the stairs and move one existing light switch. The existing wiring caused them a major headache and was extremely time consuming.
While the electricians were there, I had them add three floorboxes in the ceiling for the bedroom above. The bedroom on the main level only had one outlet that was at shoulder height near the doorway. I had extension cords running everywhere! I’m so glad I thought to have them do those before drywall and insulation.
Cost: $2200 (labor) I got a good deal because I had a close relationship with a professional electrician who helped me as a side project.

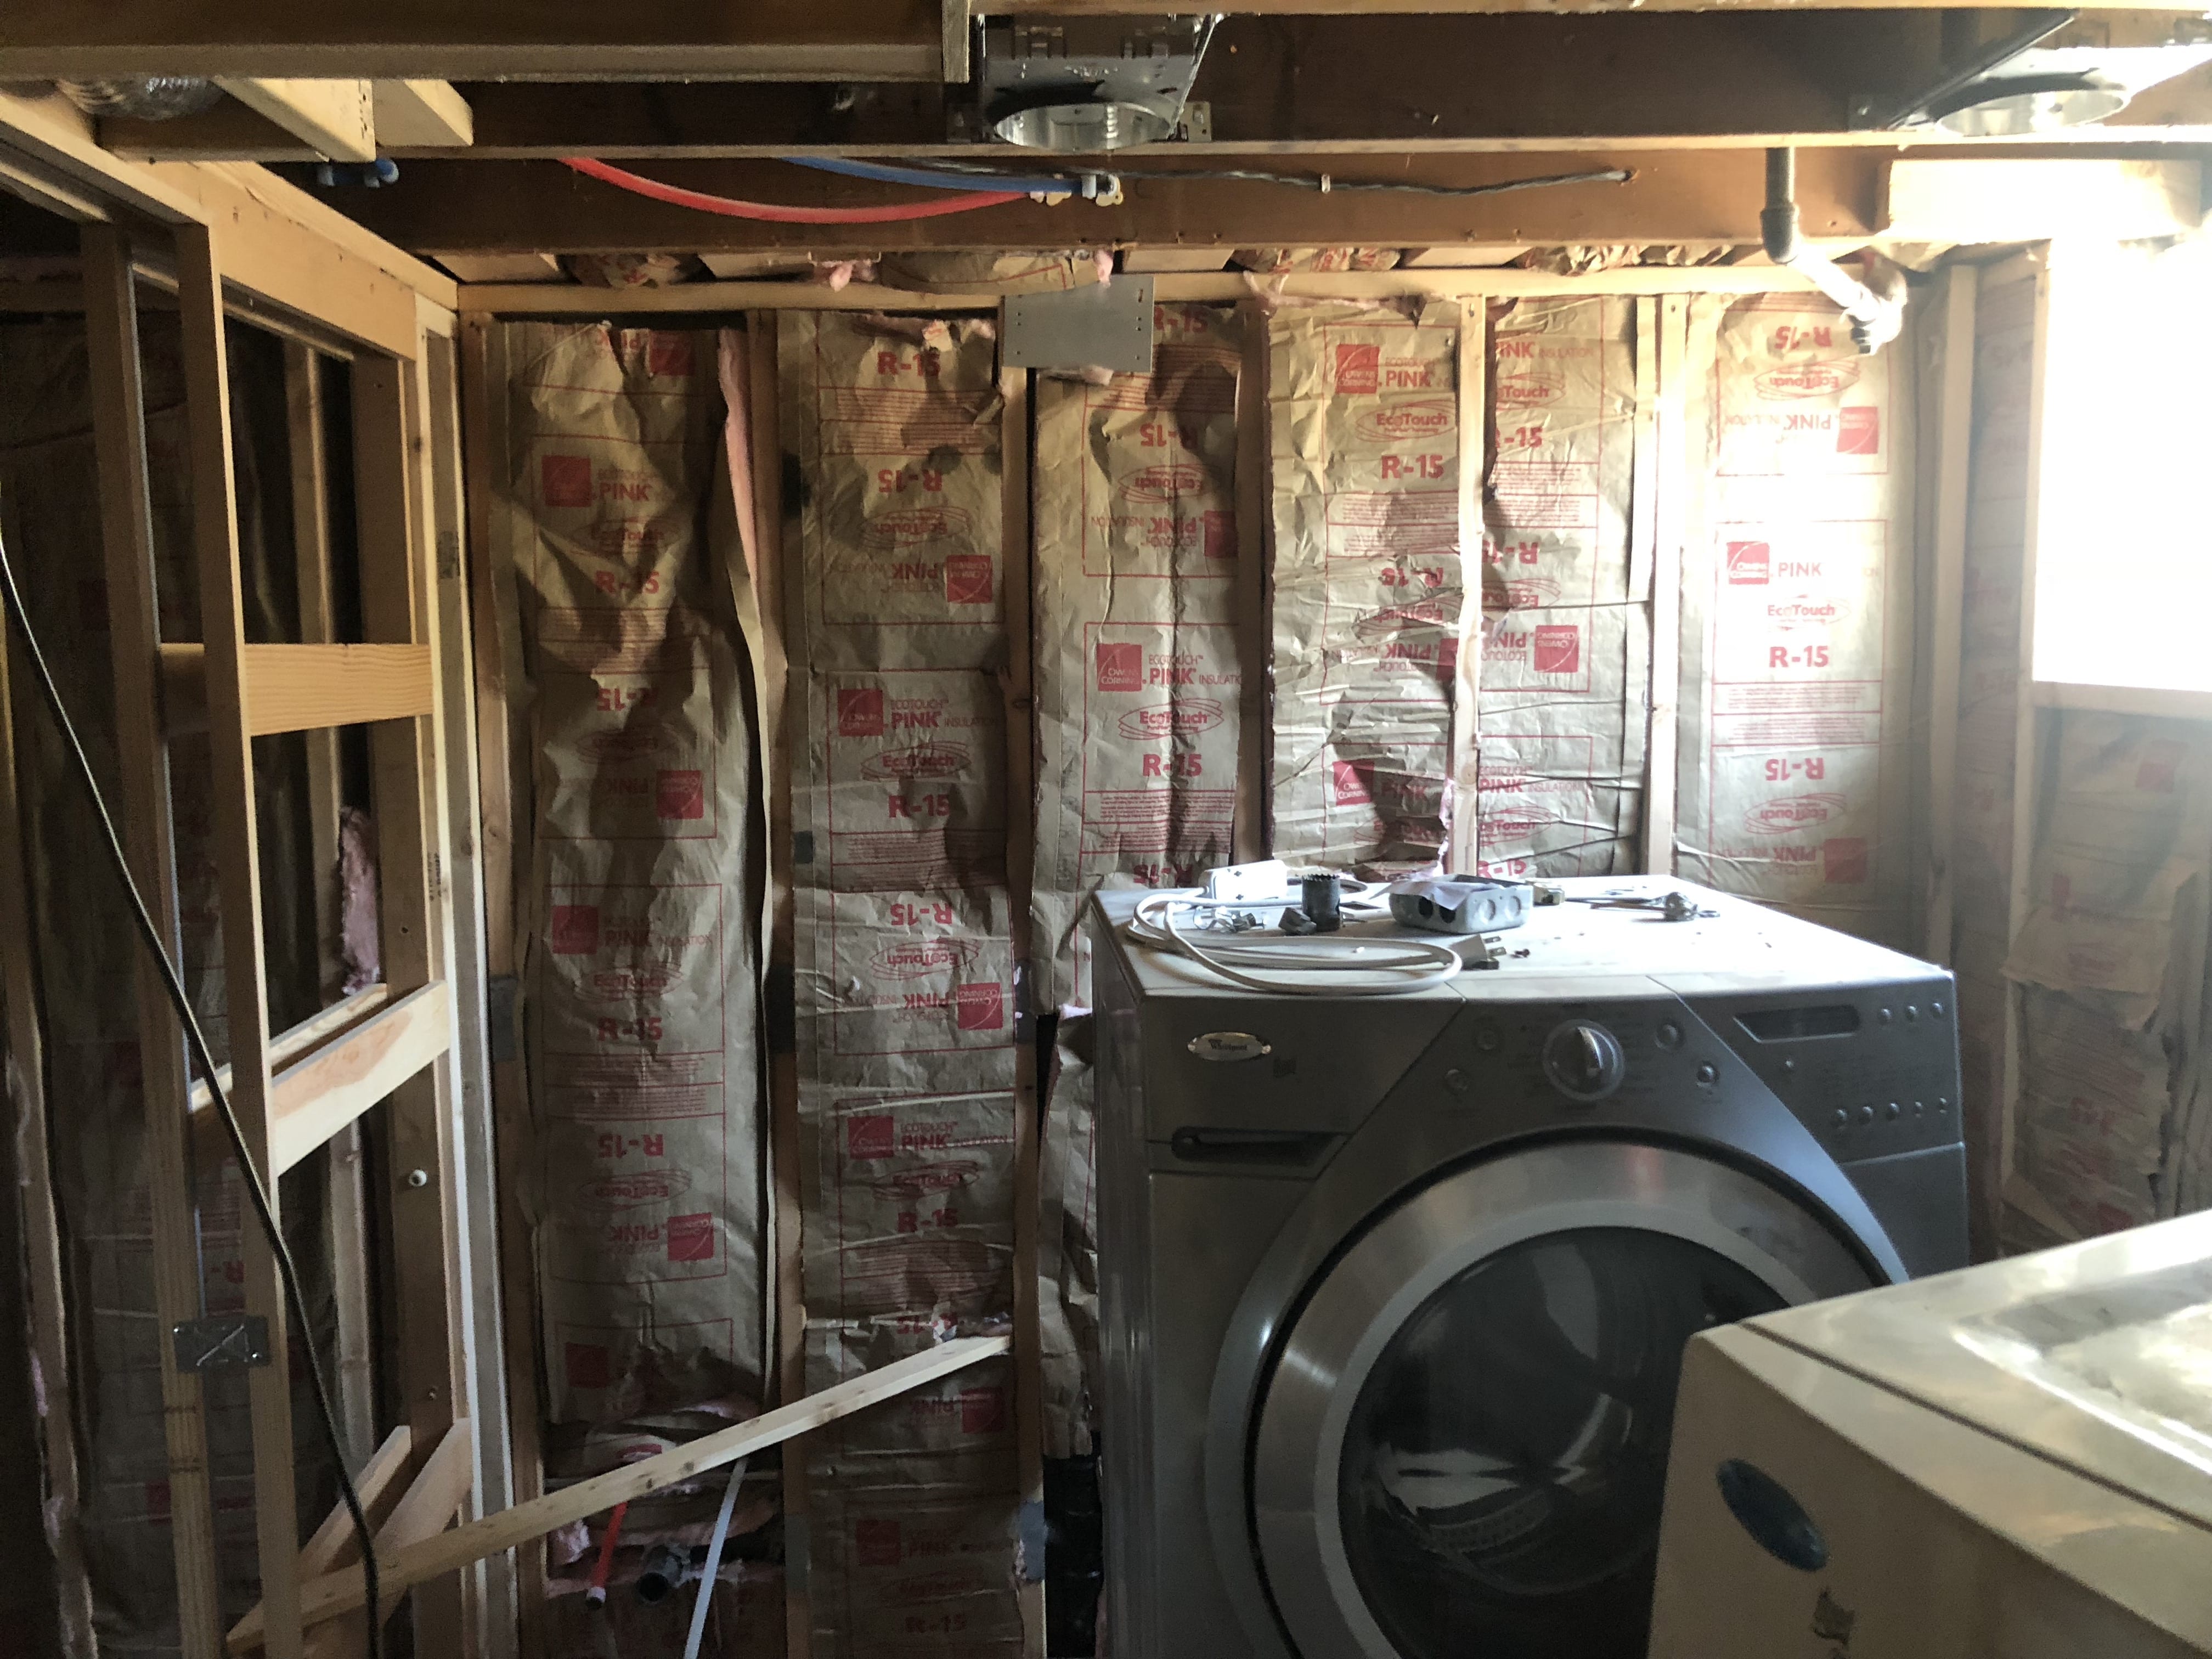
A. Insulation
After the electrical and plumbing are installed, it is time for insulation. I used batt insulation; I did consider spray-in but that seemed a better fit for attic spaces than walls. The city’s guide says check with the city regarding the proper R value you should use. If your framer did a good job spacing the 2×4’s with 15-inch gaps, this process should be easy with batt insulation. It is time consuming to cut the insulation to fit in areas that are not 15-inch gaps. You will also need to cut smaller pieces of insulation to fill the gap between the floor joints in the ceiling.
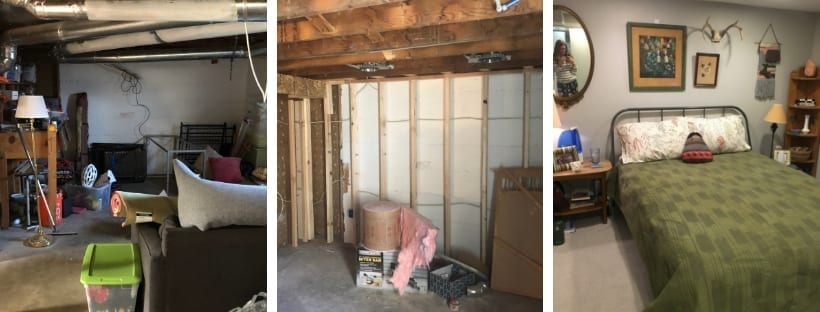
I insulated the bedroom ceiling for sound proofing. I did not frame or insulate the den (formally the bedroom) with approval from the city because it is not “habitable space.” Make sure to wear a painting suit, mask, and protective eyewear when installing. You do not need to insulate interior walls.
Cost: $674

$424 (material)

$250 (labor - I hired a guy from Craigslist)

Other quotes: $2,200 and $825
B. Drywall
Before you start getting estimates for drywall, it is helpful to know how many sheets of drywall you will need in your space. Most drywallers charge $40-$60 per sheet (a sheet is 4 ft by 8ft.). You will also need to know the type of finish; orange peel is a common texture and level five is a smooth finish which is much more expensive. I went with level 5 smooth finish because the main level has a smooth finish and I wanted it to look consistent throughout the house. You will also need to decide if you prefer round or 90-degree corners.
One drywaller told me I needed 105 sheets and charged $60 per sheet. His price was $6,300 for labor and materials. I didn’t know how many sheets I needed and when I checked the price per sheet, his number was inaccurate. Turns out I only needed 54 sheets total and that guy was trying to take advantage of me!
Make sure you use a special blue drywall called Denshield in the area around the shower and vanity that is water proof. You also should use a fire-blocking drywall around the utility room. In the bedroom I wanted superior soundproofing so I added a layer of sound board and insulated the ceiling.
My drywaller made me a list of supplies to order from Colorado Drywall Supply, LLC and they delivered next day. They bring the materials inside to the workspace for a $125 fee which is well worth it! My drywaller worked alone. It took him three days to hang the drywall and another three days to tap, mud, and texture. After he finished, I hired painters to come prime everything. Once primed, it was easier to see imperfections in the smooth Level 5 finish. The drywaller then came back to fix areas that were not smooth.
Cost: $4797 for level 5 (that is $80 per sheet)

$1297 (material)

$3500 (labor)

Other quotes: #1: $6300, #2: $7,700 (level 5), $6,100 (Level 4), $5,000 (texture)
Kyle Warren
Drywaller
720-296-1534
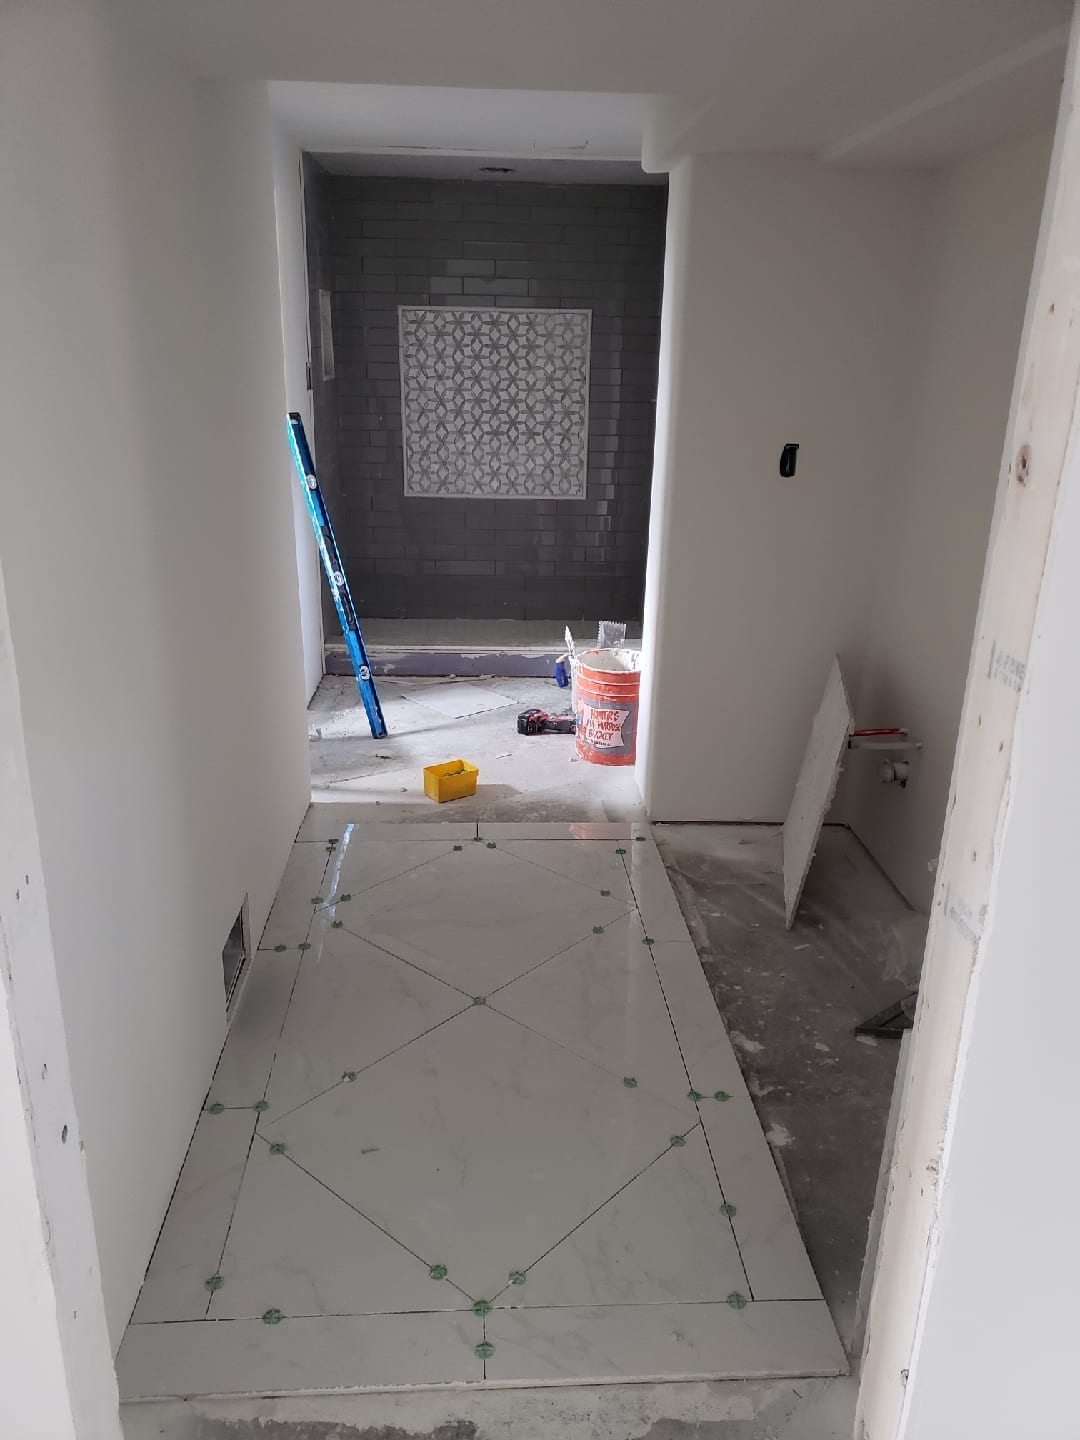
C. Tile
It is fun to pick out tile! However, tile can get very pricey! Stick to a budget when you are in the tile store. I looked at a lot of design ideas and homes for inspiration. One theme I noticed was darker tile on the floor with white tile backsplash and around the shower. I highly recommend Floor & Decor. It is much more affordable than Arizona tile. They also have three locations, very helpful sales associates, and keep track of your purchases. My tile guy accompanied me to help me select the right amount and plan the design for the bathroom. This was super helpful!
The main issue my tile contractor ran into was that the concrete floors were not level and the walls were not square. I imagine this is the case in most older homes. I had purchased a shower pan, but the tile guy wanted to make his own. Once the plumbing was turned on, the shower pan did not properly drain so he had to return and completely redo the shower pan. I would recommend buying a shower pan. Your tile person should also spend time sanding any rough tile edges after grouting.
The material cost for the floor tile was $500 and with installation was $1500. The shower destroyed my budget! The shower tile = $721 , labor = $1000, glass = $782, and shower head = $100. I ended up spending about $2600 on that shower and that doesn’t even include the framing, plumbing, or drywall! If I were to redo this project, I would have probably done a plastic insert and shower curtain.
Cost: $4083

$1301 (material)

$2000 (labor)

$782 (glass shower door)

Other quotes - Laminate would have cost $1500 for labor and material.
Tile Guy: Paul Caltabino 516-428-6302
D. Trim work
I hired the carpenter who did the framing to do all the finish work at the end of the project. The finish work included: installing doors, door knobs and stops, trim, baseboard, window sills, stair handrail, shelves, install the cabinet, alter the vanity to accommodate sinks, plumbing, peg board, access door for water main shut off, alter the vanity, hang mirrors, and install shelves and rods in the closet. As you can see there were a lot of little items to complete.
Due to our past relationship, I did not make a clear agreement with the carpenter regarding this project. We set a price of $1300 with work starting on 6/21. When he came over, he was just there to review the job. I think he had another job, so he kept delaying and didn’t show up again until 6/27. He didn’t actually show up to work on my house until 7/6 but that was to get money to order materials. He didn’t order the materials until 7/9 and started work on 7/13 after materials were delivered. At the time, he discovered they did not deliver the right baseboards, but failed to order the right material promptly. The baseboards did not arrive until 7/18… almost one month after I originally engaged him to complete the work. He got them installed in 6 hours. The problem was he did not have a truck to accommodate picking up the baseboards and doors, etc. I did not realize this when I hired him. He also did not plan ahead, communicate, or stay on task with other items that he could complete while waiting on the baseboard. I had to micromanage every small task.
Finally, we were ready for paint, carpet, and for the plumber to come back! I had been communicating with all the other contractors on almost a daily basis pushing them all back on the carpenters accord. By the time we were ready, the plumber was on vacation and I had missed the scheduled appointment on 7/11. The carpenter came back after the paint and carpet to mount the handrail, towel hooks, etc. on 7/30. Obviously, I was upset by this point. I regret not going with a different contractor at the end of June when I first noticed he was dragging his feet. I estimate this delay cost me at the one month of rent and an enormous amount of stress.
Cost: $2,400

Labor: $1400

Material: $1000
Loren Behn – Carpenter
303-550-9616
E. Cabinets
I needed a vanity cabinet in the bathroom and also cabinets for the wet bar. I decided on a basic white shaker cabinet. I got an estimate from Don Ellis (don@cabinetsolutionsgroup.info) for $2100. His cabinets were coming from J&K and JSI. The cabinets were on backorder and he did not accurately measure so I did not want to use him.
I also went into Buy & Build, INC, a place that my carpenter recommended because they have in stock inventory. For the same cabinets they quoted me $1571.68. In addition, I would still need to purchase a countertop, sinks, and faucets.
Vanity
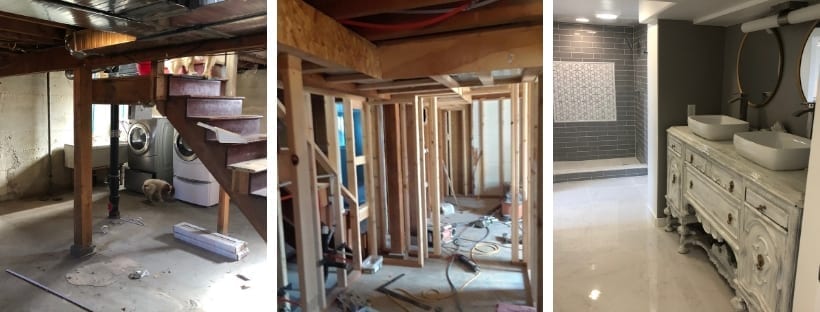
I ended up foregoing both of those options after speaking with an interior design friend named Mau Hidalgo (720-361-7716) who specializes in upcycling used furniture. We agreed on an hourly rate of $60 for him to design and help me find a unique piece of furniture for the space. He came by to measure and sent me a drawing to approve. I loved the concept and then he sent me several furniture options that would work in the space. I worked with a seller on Craigslist to deliver a huge antique buffet for $350. Instead of buying a countertop, I used an epoxy to seal the wood that cost about $50 and only took me about an hour to apply. Mau also helped me find two vessel sinks that cost $20 each at the ReStore. Retail price for similar sinks would have been $200 each. I already planned to pay my carpenter to install the cabinets, so it was only slightly more to have him cut the drawers and top to accommodate the plumbing. I believe going with this option saved me about $1000 versus going with a traditional bathroom vanity.
Cabinets – $736.32 vs Antique buffet – $350
Counter – $530 vs epoxy coat $50
2x Sinks – $200 undermount vs recycled – $40
2x Faucets Home Depot $200 vs Amazon – $100
Traditional vanity total: $1,666.32 vs
Antique upcycled vanity: $540 + design fee $160 = $700
Interior designer: Mau Hidalgo 720-361-7716
If you would prefer a countertop, I highly recommend Kate with Milestone Counters. She is amazing! 720-379-7850
Wet Bar
At this point I was running over budget and really needed the savings. I decided to skip the wet bar which would have cost an additional $1500. I have the plumbing for it and plan to complete it in the future.
Laundry Storage
While I was at the ReStore I also found a cabinet for the laundry room for $33. It was an upper cabinet that fit perfect into the space and is great for storing tools and paint cans. I also bought a used ironing board from the ReStore for $5. I ordered a new ironing board cover for $10 on Amazon. My carpenter cut off the legs of the ironing board and attached it to the top of the cabinet. He also put the cabinet on wheels and a pivot system so I can pull it away from the wall when ironing. Above the cabinet I installed a peg board from Home Depot to store my tools ($20).
Cost: $100
F. Paint
I was ready for the project to be over, so I hired professional painters. They had come weeks earlier when the drywall was completed to prime. They had to do additional priming on the spots the drywaller came back to repair. The painting took about 3 days for the crew to complete. I like my painter because he comes back after his crew finishes to check the quality. He marks areas with blue tape and his crew comes back for touchups.
Cost:
Next Generation Painting
Ryan Hammel
720-460-1213
G. Carpet
I carpeted the stairs, den, bedroom, and closet in the basement. The first estimate I got from Tony Garcia Installations was for $2000 for the carpet and install. I also checked with Home Depot who quoted me $2400 and Carpet Exchange sent an interior designer who gave me an estimate around $2200 but I didn’t like the color choices. I asked Tony if he would do it for $1675, a number I just made up. He agreed! A one-man crew installed the carpet with care and I am a happy customer.
Cost: $1675 (material and labor)
Tony Garcia Installation
330 S. Ames St
Lakewood, CO 80226
Phone (303) 972-0048
Finish Work
After paint and carpet were complete, there were many small punch list items for each contractor to come back to complete.
Electrical
After the paint was complete, my electricians came back to install all the outlet covers, light fixtures, and housing for the can lights. I paid them the remaining balance after the work was complete.
Plumbing
My plumber did not want to do the final trim work until everyone else was finished. He explained that the painters would mess up the sinks and faucets with paint if he went first. He installed the toilet, showerhead, utility sinks, etc. last. He had to change the plumbing to accommodate the antique vanity which was not part of the original plan. He also removed the last piece of galvanized pipe that was feeding the new hot water tank. Galvanized pipe corrodes and could have caused the water heater to malfunction. I paid my plumber in full in May when he did all the drain work. He is a good guy and I trust him very much because he came back to complete all the work he agreed to do. Most contractors cannot be trusted this way!
Tommy the Plumber and Lisa
720-877-5634
HVAC
They were the first guys in and the last guys out. They came back to install vent covers and the dryer vent.
Conclusion
This project really tested my patience! Dealing with contractors is an exhaustive process. From the beginning I planned to have a contractor appreciation party when the project was complete. I’m very happy I did this because it kept me on good terms with each contractor through the very end. There were times in every relationship where I was not happy with them but keeping the end in mind carried me through.
Every day you will potentially spend several hours scheduling, shopping, picking up material, and checking the contractors work. The homeowner ends up making hundreds of small decisions that add up to the end result. You will completely underestimate how much time a project like this will take you and your contractors.
A project like this is extremely messy! The dust, trash, and displaced items will clutter your house and your brain. Your house does not feel like it belongs to you for several months which really took a toll on me mentally. I had a huge sense of relief about a month after the project was complete when my house was back to normal; I finally felt like I was a whole person again.
Cost
In total I spent $40K finishing the basement. I estimated $35K and many contractors told me it would cost $50K. I didn’t believe my own estimates and held onto the idea that I could finish it for $25K, but I was sorely wrong. It was a humbling experience to say the least.
Update
Appraisal
Roommate